By Robert Bergman, ILoveGrowingMarijuana.com
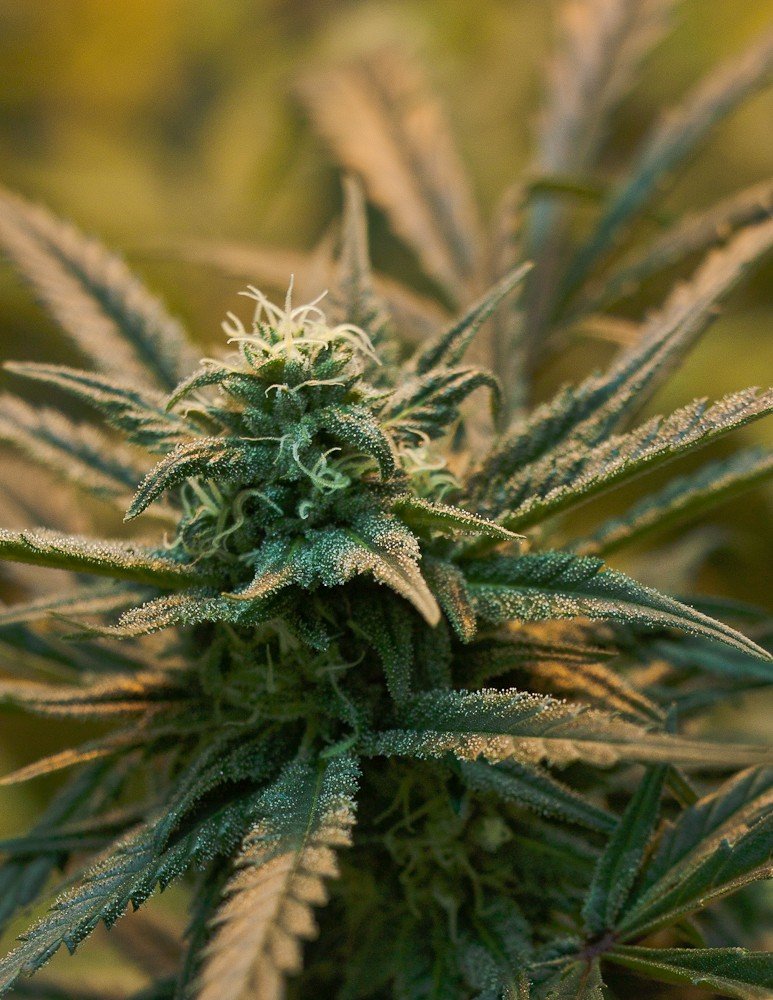
![how]() If you are thinking about growing marijuana yourself, you are likely unsure or indecisive about how to begin. The first step, of course, is deciding what kind of setup you prefer. Are you going to grow outdoors or indoors? Will you grow just one plant or many? What strain should you buy, and what equipment do you need? We will cover all this and more below.
If you are thinking about growing marijuana yourself, you are likely unsure or indecisive about how to begin. The first step, of course, is deciding what kind of setup you prefer. Are you going to grow outdoors or indoors? Will you grow just one plant or many? What strain should you buy, and what equipment do you need? We will cover all this and more below.
When people are first looking at growing their own marijuana plant for the first time, they generally end up reading articles and guides about how to set up a big, successful operation. While success is certainly something you should be looking for, the fact is, that growing marijuana for only yourself does not need to be a huge endeavor. Why not start out with just one plant.
In the United States more and more people are becoming interested in growing their own marijuana. Whether this has to do with the changing legality of it or if it is simply a trendy thing to do at the moment is irrelevant. The point is, people are getting sick of needing to buy sub-par marijuana to enjoy it. Therefore, they have decided it is time to grow their own.
Growing your own marijuana can have a lot of positives to it. You will know exactly where your weed comes from this way, and how the plant was treated. There will be no question of whether residual chemical fertilizers are in the product, or if it is really as high quality as the seller claims, and so on. It juts simplifies things in that it removes any room for confusion or mistrust.
Of course, growing your own marijuana can also have its downsides. It is, after all, still illegal in most places, even in those that allow some amount of marijuana consumption. That being said, it is safer for your personal health because you won’t need to deal with someone else you don’t know to provide you with marijuana. Like growing any consumable plant, it is also highly rewarding. When you finally get to consume the end result after months of work, you will enjoy not only the product itself but also the great feeling of accomplishment that comes with it.
Why grow only one marijuana plant?
![Why grow only one cannabis plant]()
There are a number of reasons why growing just one plant can be extremely beneficial. First of all, with only one plant you are better able to focus your efforts, making it more likely that the one plant will grow better than the individual plants in a plot of more than one marijuana plant.
Additionally, security is better with just one plant. While authorities are known for busting people who have a large-scale growing operation contained within their home, who has ever heard of someone growing just a single plant having their house raided? The fact is, law enforcement has bigger fish to fry. Even if they did want you and your one plant, one plant is far easier to hide, making it unlikely anyone would notice it anyway.
Download my free marijuana grow guide at this link for tips on how to grow your own marijuana
Even better, growing only one plant is going to be extremely inexpensive when compared to other grow setups that generally include more plants and therefore more expensive equipment and resources. One plant only needs the bare minimum, so whether it’s seeds, soil, nutrients, lighting, or even water, you just don’t need as much. Growing one plant is the perfect way to try your hand at growing marijuana without investing a huge amount of money and time, making it much more low-risk than if you were trying it with many plants.
Getting started
![How to start growing cannabis]()
Now that you have decided you are going to try growing just the one plant at home let’s get into the details of how to actually do it. First of all, don’t get tied down with the stress of how difficult you think it might be. It simply isn’t as hard as it sounds — after all, there’s a reason marijuana has the common nickname “weed.” Like any weed, it is able to grow just about anywhere.
One thing you should know about growing weed is that it is a flowering plant. In case you haven’t gardened before, this means that it will grow buds just once per year naturally in the fall. It “knows” when to start growing buds when the sunlight begins to dwindle below a certain point.
Although you will be growing your marijuana plant indoors, this is still an important fact to know because it will affect how you set up your lighting and schedule the lighting for your plant. Unless your plant has more than 12 hours of light exposure every day, it will begin to flower — and a plant that flowers too early is going to have a much smaller harvest than if it flowers on time. And when you’re growing just one solitary plant, the size of that plant’s harvest becomes critical.
As a good rule of thumb, make sure your plant has grown (in its middle “vegetative” stage) for a bare minimum of one month to a month and a half before you even attempt to have it enter the flowering stage. While growing in its vegetative stage, make sure your plant is getting between 16 and 20 hours of sunlight (or other kinds of light) per day — the higher, the better. Buying a lamp is going to be necessary for growing it indoors.
Lighting
![Cannabis lighting]()
Even if your plant has a nice window that exposes it to lots of sunlight, it is still going to need to be helped along with an actual lamp. This lamp cannot be any desk lamp or floor lamp; it needs to be a lamp designed specifically for growing plants.
Luckily, lighting doesn’t have to be expensive — and it certainly can be kept at a lower cost when you only have one plant. Also, keep in mind that lighting is the most expensive piece of equipment that you are going to need to buy, so even if you aren’t happy with the price, it is the only item that will cost as much.
The kind of light you buy will depend on the situation you have in your house. If your plant will be next to a window that provides excellent light exposure already, for example, then buying a fluorescent light bulb will be your best bet as it just will add on some extra lighting hours after the sun goes down. Try buying a T5, a T8, or a CFL to get the minimum amount of light your plant will need.
This, however, is not going to maximize the amount of light your plant is getting. The more light, the better when it comes to growing a marijuana plant, so if you really want to get the best results then just going for the minimum isn’t going to cut it.
If you don’t have a window setup, try a 250-watt HID light bulb instead, which includes both HPS bulbs and MH bulbs. These can cost less than $30 although the bulbs don’t fit in a regular bulb fixture so you will need to include the more expensive cost of an additional fixture. The best lighting option for a marijuana plant is a 250-watt HID lamp so it may be worth it nonetheless.
If your plant is not receiving enough light, you will clearly know because it will begin stretching and reaching upwards, having more upward growth than outward growth. This is not good for a marijuana plant because bushy plants are the ones that are capable of growing huge, potent buds that every marijuana user dreams of.
Additional lighting information
When you get into the more minute details of lighting, things can get a bit complicated. If you really want to maximize how much light you are exposing your plant to, however, it is a good idea to really understand what you are dealing with.
Although all the lamp options will likely be good enough to grow a healthy plant and get a decent yield, different kinds of lamps can achieve different results. If you go with a VHO lamp, for instance, your plant will probably grow as much as three times as fast as a plant that is growing underneath a more “standard” type of lamp. With a VHO light, you can expect to need to keep raising the light up more and more every day because the plant will be growing so fast.
Download my free marijuana grow guide at this link for tips on how to grow your own marijuana
That being said, a VHO lamp may be out of your price range. Additionally, you might not have the physical space for growing a plant that big. It is, therefore, important to consider all the aspects before deciding on a lighting system for your plant.
One of the best timers you can use for whichever type of lighting you go with is a vacation timer. These timers are intended to be used in regular household lights to make it appear as if you are home when you are really on vacation. Although they were not created with the purpose of setting a timer for growing marijuana plants, they nonetheless work wonders. It is a good idea to use a timer anyway because it will keep things extremely consistent, and it will be easy to remember how you treated your plant during one grow “season” when you need to consider how to change this treatment for your next plant that you grow.
Temperature and humidity
![Temperature and humidity for growing cannabis]()
The key factor to remember with the temperature and humidity surrounding your plant is the fact that it should be different during the day (or during the artificial “day” created by your lighting technique) and the night. When the lights are on, the temperature should be between 68 and 78 degrees Fahrenheit. This should drop down by about 15 degrees for the nighttime temperature.
Generally speaking, keep the area around your plant relatively dry. This encourages more resin to coat the surfaces of your plant, as an excess in humidity will instead keep the leaves dry and fairly resin-free. That being said, be sure the temperature is not too warm when you have a dry environment because this could lead to an unhealthy amount of drying out of your plant altogether. It will start to turn brown, and its roots won’t be able to take in the proper amount of water to keep your plant healthy.
Another reason you need to keep the humidity down is that humid areas cause plants to have broader leaves. This is because, in dry climates, marijuana plants are able to respirate easily and quickly — in other words, the moisture is pulled off of their leaves in a dry climate more easily. Therefore, marijuana plants growing in humid climates grow broader leaves to be better able to respirate despite the humidity. Broader leaves are bad for the consumer of marijuana, however, because they will have a lower resin to leaf surface area ratio. Since you are only growing one plant, these seemingly small details can make a big difference in your final product and how much you get out of that plant.
If your grow room (or, rather, the room where you happen to be growing your new favorite potted house plant) is too humid, you will need to employ some sort of method to dehumidify it until it is down to a healthy humidity level. That being said, you should only use a dehumidifier if you already own one or if you are not worried about the extra cost. Generally speaking, investing $100 or more in a new dehumidifier is a bit overkill for just one potted marijuana plant, so decide for yourself if it is a good idea.
Ventilation
![Cannabis ventilation system]()
While connected to humidity and temperature, ventilation is a separate aspect that needs to have as much consideration as the other aspects of growing your marijuana plant. Ventilation is a preventative measure against things like mold, fungi, and other unhealthy issues that could develop for your plant. While it is perhaps more important for a room filled with marijuana plants rather than just one marijuana house plant, it still should be taken into consideration.
A lack of proper ventilation can cause the pores in the leaves of your marijuana plant to start to clog, causing that leaf to eventually die off. If there is too much leaf death, eventually your plant itself could die. More likely is probably just the fact that your plant will be losing some valuable resources since its leaves are responsible for absorbing the energy of the sun and using it for faster and better growth.
This is probably going to be more important if you are growing your marijuana plant inside of a small closet or cupboard. Since you will likely need to enclose it this way just before and during its flowering stage, however, you should probably plan ahead and make sure there is enough ventilation before you even start growing your plant in there.
Ventilation is perhaps the most important during the flowering stage of your plant’s life, because, without enough air movement and fresh air in general, the thick, juicy buds are prone to developing mold. Moldy buds are completely unusable, so this would be completely devastating to your plant and to your final yield.
If you have set up the closet or cupboard (or other enclosure) and are in need of a source of ventilation, try putting in a fan. If you can set it up in a way that the fan is pulling fresh air in from the outside, then it will be perfect. If not, a fan that even just moves the air around can be very helpful. Using a fan from an early age of your plant has the additional benefit of encouraging it to grow a thicker stalk, as it registers this as potentially harmful wind and therefore grows stronger to counteract it. The thicker and stronger your plant is, the better.
Watering
![Watering cannabis]()
Watering is important for marijuana plants for obvious reasons. What may not be so obvious, however, is that the quality of the water is equally important. It makes a big difference what city you are living in and how your city specifically treats its water. There may be more chemicals in your water than in a neighboring city’s water, for instance.
Regardless of where you are located, you will likely have some chlorine in your water. (All water in the United States is treated with at least some amount of chlorine, for example.) It isn’t a very healthy additive to marijuana plants.
Luckily, chlorine is quite easy to get rid of. You simply need to let the water sit for 24 hours or more, with the container holding the water open to the air around it. This will also ensure that the water becomes the same temperature as the room. Watering plants with water that is room temperature is definitely healthier for them than shocking them with ice-cold water, so this process kills two birds with one stone.
If your particular city adds more chlorine to its water than most other cities, then buying anti-chlorine drops may be a good idea. These drops can be found at any pet store because they are used to prepare an aquarium to support fish (which can’t survive with chlorinated water either).
Download my free marijuana grow guide at this link for tips on how to grow your own marijuana
The next thing to consider is the quantity of water you are feeding your plants. If your plants are growing in a container that holds three gallons of soil, then up to three quarts of water can be given to them. The key is to observe how the soil is in terms of its moisture. You want the entire soil to be moist evenly — this is why it is better to water a larger amount once in a while than to water a small amount more often. If you only give your plant a little amount of water, the water won’t make it all the way to the bottom of the soil (and therefore the roots at the bottom won’t get any water access).
That being said, before watering your plant in any amount you need to be entirely sure that its container has proper drainage holes at the bottom. You should see the water coming out the bottom when you water your plant. If this doesn’t happen, it either means that you aren’t feeding it enough water to reach the bottom or somehow the water is getting caught inside the soil — and that can lead to significant health problems. As long as the soil has sand and perlite in it, however, it is unlikely that it will have drainage issues.
To check for the correct time to feed your plant its dose of water, check the soil to see if it feels moist. If it does, don’t water it yet — wait for one to two days before watering again, because even when the top feels dry, the bottom of the soil may still be moist. Never water your plants when they don’t clearly need to be watered, as that can lead to a myriad of overwatering issues.
Germinating the seed
![Germinating the cannabis seed]()
Once you have purchased all the supplies and equipment you need, including the seed itself, it is time for germination to begin the growing process. There is not one perfect or right way to germinate, but it certainly can be kept simple and effective.
First, put the seed about a quarter inch to a half inch into the soil, covering it completely. The soil should remain moist but never get truly wet, and should stay at a nice, warm 75-degree temperature. All you have to do after that is wait to see the tiny sprout beginning to appear in 3 to 7 days (which can vary according to the strain and a number of other factors).
An additional option for germinating the seeds is to put the seed inside several moist paper towels. You can also use a damp sponge for this. Then keep the paper towels or sponge moist (but not wet, much like with the soil method above) until you see the seeds sprouting. They could sprout in as little as 24 hours or as long as a week.
After germinating the seed(s) this way, you should plant it into the soil. This should be done as soon as you have seen the seed cracking open to allow the tiny sprout to emerge. Keep the soil moist but not wet, and make sure it is covered on the top.
Be sure to give your new plants plenty of light once they are planted in the soil. The lights should be only about two inches away from the soil, and should not be moved upwards until the seedling has grown a decent amount. Some people provide their young seedlings with 24/7 light for maximum growth, but this part is up to you.
The vegetative stage
![The cannabis vegetative stage]()
The “middle” stage of your plant’s life is its vegetative stage when it will grow the most in its leaves, branches, and height. Its stem will be getting thicker and stronger, and it should be growing many new leaves at an increasingly fast rate. The vegetative phase is crucial for your plant being able to absorb as much energy from the sun as possible (as the leaves absorb this energy), and therefore will contribute to a healthy flowering stage later using all the energy it had acquired. A larger plant means more and bigger buds, so you should take the vegetative stage seriously.
That being said, you can only grow your marijuana plant to use as much space as you have in your home. If you just want a small plant for personal use of marijuana, then just 30 days of the vegetative phase should do the trick. Some people even go as short as two to three weeks of the vegetative phase and still get everything they need from their plant.
Some growers (especially experienced ones) use training methods to get their plants to grow outwards rather than upwards, thus maximizing the amount of growth without growing too huge for the indoor space that they have.
The flowering stage
![The cannabis flowering stage]()
With indoor marijuana plants, you are responsible for everything. The soil, the water, the nutrients, and even the “sun” all come from you. Because marijuana plants respond to the amount of light they are receiving, you will need to change the number of hours of light that your plant is exposed to — in fact, it’s actually the number of hours of darkness that triggers their transition to the flowering stage, but the same rule applies.
To trigger the flowering stage (which should be done after your plant has had ample amount of time to grow and develop), you will need to expose it to 12 hours of “sunlight” (or lamp-light, as it were) and, more importantly, 12 hours of uninterrupted darkness. Make sure the darkness is complete and does not have even one instant of light, as this will cause the plant to stop entering the flowering stage. Additionally, the 12 hours of light your plant does receive should be as strong as possible, so be sure to keep using your lamp.
The beauty of growing one indoor potted plant is that you can move it to wherever you want it, whenever you need to. In this case, before you start triggering the plant to enter the flowering stage you should move it to some sort of enclosed location, such as a closet or cabinet. There, set up your lighting so that you are able to expose the plant to its 12 hours of lighting and 12 hours of darkness perfectly. Using an outlet timer is probably your best option because it leaves out any room for error.
Remember, make sure the 12 hours of darkness are total and entirely uninterrupted. If there is any light that gets into the enclosure (i.e. if you accidentally open the door during the 12 hours of darkness), even for a second, your plant will start getting stressed and confused about the seasons. This stress can cause all sorts of problems, not least of which would be it developing into a hermaphrodite, or else it may simply have a lower quality and lesser quantity yield at the end.
The flowering stage usually lasts between 8 and 10 weeks, and it will remain in this phase until the harvesting time has come.
Harvesting and curing
![Harvesting and curing the cannabis plant]()
After you harvest the plant (by removing the buds and the leaves curling around them), you will need to cure the plant matter in a way that makes it smokable (and enjoyable). After drying the plant matter by hanging it upside down in a cool, dry room for days at a time, store the dried plant matter in clean glass jars, closing the lid tightly. Leave some extra room in the jars because the extra air will be helpful in the curing process.
Your main concern when curing marijuana is the development of mold. This will only happen if the plant matter is too moist when you start storing it in jars, so be sure it is quite dry before doing so. Open the jars every so often (first once per day, then once every few days) for several weeks until the aroma and texture seem just right. After that you will be able to smoke the product to your heart’s content — just make sure to store them properly (in a cool, out of the way location).
Other aspects to consider
![Other aspects to consider when growing one cannabisplant]()
There are a variety of other aspects to consider when you are growing any number of marijuana plants. For instance, what type of container will you grow your plant in? And what type of soil should you put into that container?
Containers and transplanting
![Containers and transplanting your cannabisplant]() When choosing a container for your plant, you can buy a breathable pot of some sort and rest assured knowing it is the best option for growing a marijuana plant. One good type of breathable pot is a fabric pot. Other pots are fine as long as they have drainage holes with something beneath to hold the water that trickles down and out. Try to avoid letting this water sit for a long time, as it could spark the interest of unwanted visitors such as mold or insects. As a general rule of thumb, the first container you use should be about six inches across or less. If you don’t use a fabric pot, a clay or a plastic one should be fine.
When choosing a container for your plant, you can buy a breathable pot of some sort and rest assured knowing it is the best option for growing a marijuana plant. One good type of breathable pot is a fabric pot. Other pots are fine as long as they have drainage holes with something beneath to hold the water that trickles down and out. Try to avoid letting this water sit for a long time, as it could spark the interest of unwanted visitors such as mold or insects. As a general rule of thumb, the first container you use should be about six inches across or less. If you don’t use a fabric pot, a clay or a plastic one should be fine.
Another aspect of the container that you need to consider is how big it is. This will depend on how fast your plant is growing as well as how big the marijuana plant is in general. If you didn’t already know, it’s important to note that transplanting will absolutely be necessary at some stage — probably more than once. Transplanting is a tricky process, even when it is done perfectly. It always causes some amount of shock to the plant, which means it slows down the growth inevitably to a certain extent.
Transplanting is nonetheless important because otherwise you would need to start growing your seedling in a giant pot. While this may sound harmless to the new grower, it is in fact very dangerous because it is easy to overwater a plant that is growing in a pot too large for it. If you overwater your plant, all sorts of health issues can arise — mold and root rot can easily occur because of the excess of unabsorbed water, and the lack of oxygen can cause big problems for the plant.
One of the most common problems that happen with new growers is overwatering, as it is easy to misjudge exactly how much your plant needs and the prospect of underwatering is perhaps more daunting to many new growers. To help avoid this problem, simply don’t start growing your plant in a pot that is too large for it — begin it in a small one and have larger pots that increase incrementally as your plant grows. In other words, plan on transplanting.
The way to transplant your marijuana plant is simply in theory, but rather touchy in practice. First, get the larger container ready for the plant by filling it with soil and creating a hole for the plant. Then take the pot that contains your marijuana plant, tip it upside down, tapping the bottom until the plant and the soil pops out. There should be a chunk of soil with the ball of roots coming out without any physical effort, then place the entire chunk into the hole in the new container. Water the plant plenty and baby it a bit more than usual, as the process can be shocking.
If you are not comfortable with the idea of transplanting your marijuana plant, an alternative option is to use a Jiffy-Pot or a similar product. A Jiffy-Pot is a container made of peat moss that has been compressed. It helps with any potential transplanting issues because it protects the roots until the plant has been transplanted into a bigger pot. Once in the new soil, it will start decomposing and allowing the roots to break through it, making for a smooth and protected transition to the new pot. If you do use a Jiffy-Pot, make sure that the larger pot has at least 3 gallons of soil.
The key with transplanting marijuana is to always plan ahead. Depth is perhaps more important than width, so if you are going to grow a large plant, be sure that the pot is correspondingly large in volume. The last thing you want is for your plant to become rootbound in a container that is too small. A rootbound plant is one that has its roots grown around the outside of the pot, forming a sort of wall. When this happens it either doesn’t allow water in or out, meaning it will be thirsty all the time or will invite root rot or other health problems. Even if you change pots, the effects of being rootbound can last for a long time afterward.
Soil
![Growing your cannabis plant in soil]() For your growing medium (or the soil), the solid choice is always an organic potting soil. You could also look for mediums that are peat, coco, or sphagnum based, as they work quite well for growing marijuana as well. The key is to choose a soil or medium that is airy enough for oxygen to reach the roots.
For your growing medium (or the soil), the solid choice is always an organic potting soil. You could also look for mediums that are peat, coco, or sphagnum based, as they work quite well for growing marijuana as well. The key is to choose a soil or medium that is airy enough for oxygen to reach the roots.
You can buy a medium that already has a certain amount of nutrients contained in it — organic soils are generally this way. This means you won’t need to feed nutrients to your plant much or at all until the flowering stage. When you do feed nutrients to your plants, go the organic route whenever possible as it is less likely to cause a nasty “nutrient burn” to your plant. Anything that has lots of salts is a bad idea (Miracle Gro, for example).
The quality of your soil is almost as important as the quality of the seed that you buy — in other words, it is vital. You need to make sure that any soil you use is sterilized to avoid the presence of parasites or other annoying and harmful critters. Luckily, high-quality soil can be found just about anywhere — your local garden center and even stores like Walmart or certain grocery stores will have it.
Besides having an airy quality (which also allows the soil to drain properly — another important way to avoid the development of mold or fungus), good quality soil should also have a balanced pH level (between 6.5 and 7.5). If the soil is too acidic, then the marijuana plant will not thrive and has a higher chance of being male (which, if you know anything about marijuana plants, you know is not ideal). In addition to being airy enough for draining and oxygen access, the soil should also have humus in it because it does need to retain the water and nutrients you feed it to a certain extent.
Some growers prefer to form their own soil so that they can ensure it is exactly the mixture that they want. If you are interested in making your own soil, the best way to do it is by mixing together sand and moss (with a 1:2 ratio) as well as another part of either sponge rock or pearlite and soil (a 1:4 ratio). Always make sure the pH level is balanced — use a pH testing kit or litmus paper to do this. If the pH level of your soil (whether homemade or store-bought) is too low by one point, add half a pound of lime per each cubic foot of soil.
If you want to use your own soil from your backyard, you will absolutely need to sterilize it. To do this, moisten it and then put it in the oven at 250 degrees Fahrenheit for sixty minutes or so. Warning: it will smell terrible. After that, put in some of your fertilizer of choice — one tablespoon per every gallon of soil should do the trick. Make sure it is mixed in completely.
Fertilizers and nutrients
![Fertilizers and nutrients for you cannabis plant]() Another mistake that many new growers make is adding too many nutrients to their young, vulnerable plants. If you do it, you will end up burning your plants. Nutrient burn can have some major negative health effects, so it’s best to avoid causing this at all costs.
Another mistake that many new growers make is adding too many nutrients to their young, vulnerable plants. If you do it, you will end up burning your plants. Nutrient burn can have some major negative health effects, so it’s best to avoid causing this at all costs.
A good thing to keep in mind with nutrients and marijuana plants is to always start off slow. If you aren’t sure of how large of a dose to feed your plant, give it less than you would expect. Also, remember that you should not feed your marijuana plant any nutrients at all until it is at least three weeks old.
One good way to introduce your young plant to your fertilizer is to dilute it quite a bit, then slowly increase the amount of fertilizer within your fertilizer and water mixture. If you need a recommendation for what brand to try for your marijuana plant, go for either Eco-Grow or Rapid-Gro, as they are both commonly used in the growth and care of marijuana plants. Because adding a fertilizer generally always has some effect on the pH level of the soil, be sure to continue testing your growing medium for its pH level to ensure that it remains at a good value.
More often than not, feeding your plant fertilizer will cause the soil to become more acidic (or a lower pH value). If this goes untreated, it will eventually start having adverse health effects on your marijuana plants. It will lead to poor performance in terms of how well your roots are able to absorb the nutrients they need, simply because salts are the result of the fertilizer breaking down in the soil. When these salts accumulate, your plant will start to have these problems.
Some growers employ a method call leaf feeding, which should not be done until your plant is at least a month and a half old. It involves taking your fertilizer and dissolving it in warm water, then putting it into a (clean) spray bottle of some sort. Then simply spray the leaves of your marijuana plant with the solution and they will absorb the nutrients they need.
As long as you increase the amount of fertilizer given to your plant in a gradual way, you should be able to get away with feeding it quite a bit of fertilizer in the end. Marijuana plants are very hardy plants, after all, so you just need to do things that make sense to them and work for their mechanisms.
Before your plant is three months old, only feed it once every few days. Then, once you are getting ready to spur the flowering stage to begin, lower the amount of fertilizer you are feeding your plant. Most importantly, you need to flush out the fertilizers completely one or two weeks before you harvest it so that you can safely consume the product later. Certainly don’t add any fertilizers in the last few weeks of the flowering stage.
If you are someone who is interested in keeping things as organic as possible, you may want to look into using worm castings instead of chemical fertilizers. Organic worm castings, although expensive, are certifiably organic in every way. They are fed with all natural materials, and their castings are incredibly rich and healthy for marijuana plants. If you are willing to bear the extra expense, the results should be highly positive.
Pruning
![Pruning your cannabis plant]() Pruning is generally an optional endeavor, although some growers absolutely swear by it. It can work wonders for a plant that you want to grow wide instead of tall, however, so for an indoor plant, it may be a good idea to look into the methods of pruning.
Pruning is generally an optional endeavor, although some growers absolutely swear by it. It can work wonders for a plant that you want to grow wide instead of tall, however, so for an indoor plant, it may be a good idea to look into the methods of pruning.
That being said, try choosing a strain of seed that won’t need pruning to begin with. Check the description and reviews to see that it is a shorter and bushier strain so you won’t have to deal with a monster plant. Otherwise, you will need to babysit your plant quite a bit more, and after a certain point, you just don’t want to dedicate so much time to one house plant.
If you do start seeing your plant growing taller than you would like, it’s time to get into pruning. Simply cut off the top of your plant, right where the top two branches meet. It should be done with a razor sharp blade, cutting straight across. This method (called “topping”) will also serve the purpose of increasing the resin amount of the new growth, as tops always produce more resin. Topping also helps with the speeding up the growth of branches that are further towards the bottom of the plant, which wouldn’t happen without this pruning method.
Thanks for reading. Please leave comments or questions below and don’t forget to download my free grow bible. For any grow related question please visit the marijuana support page.
The post How To Grow Just One Marijuana Plant At Home appeared first on TheJointBlog.
 It is a product of many names: BHO, honey, erl, hash oil, honeycomb, honey toast, wax, shatter, glass, whip, comb, ‘tane, and more. As its popularity increases, more and more people are learning about butane hash oil (BHO) made from marijuana. There’s a reason it’s becoming so popular in recent years.


 When choosing a container for your plant, you can buy a breathable pot of some sort and rest assured knowing it is the best option for growing a marijuana plant. One good type of breathable pot is a fabric pot. Other pots are fine as long as they have drainage holes with something beneath to hold the water that trickles down and out. Try to avoid letting this water sit for a long time, as it could spark the interest of unwanted visitors such as mold or insects. As a general rule of thumb, the first container you use should be about six inches across or less. If you don’t use a fabric pot, a clay or a plastic one should be fine.
 For your growing medium (or the
  Another mistake that many new growers make is adding too many nutrients to their young, vulnerable plants. If you do it, you will end up burning your plants. Nutrient burn can have some major negative health effects, so it’s best to avoid causing this at all costs.


 they are birds, insects, mammals, or even other humans, cultivated plants seem to have a target on their backs. While humans don’t really eat raw cannabis, some pests certainly seem to like the taste. If left unchecked, an infestation can end up ruining your crop. At the same time, using harsh chemical products to repel the pests can be harmful to you later on. To avoid all that, we have compiled a list of some safe and effective repellents (and other safety precautions) to keep bugs away from your plants.
 Many growers want to keep their female plants from being fertilized because it is the only way to ensure sinsemilla buds. These buds don’t have seeds and they will have ample THC by the time the harvest comes around. Even then, many marijuana growers just like to get the males out of the garden because they don’t produce that much THC. Determining the sex takes a subtle attention to detail and quick action. Below are a few tips for sexing marijuana plants.


 for some examples) to their marijuana plants to camouflage them better; otherwise, planting them close to similarly colored and sized plants could do the trick. Make sure these plants won’t die earlier than your plants, however, as that would make your plants be even more obvious.


 properly. Each seed contains a full, little plant that has a root, stem, and a couple of leaves. There are also enough nutrients in the seed for it to survive the first portion of its life. During germination, these vital nutrients (proteins, carbs, etc.) are transformed into glucose, which all plants need to for growth.
 they are birds, insects, mammals, or even other humans, cultivated plants seem to have a target on their backs. While humans don’t really eat raw cannabis, some pests certainly seem to like the taste. If left unchecked, an infestation can end up ruining your crop. At the same time, using harsh chemical products to repel the pests can be harmful to you later on. To avoid all that, we have compiled a list of some safe and effective repellents (and other safety precautions) to keep bugs away from your plants.
 Many growers want to keep their female plants from being fertilized because it is the only way to ensure sinsemilla buds. These buds don’t have seeds and they will have ample THC by the time the harvest comes around. Even then, many marijuana growers just like to get the males out of the garden because they don’t produce that much THC. Determining the sex takes a subtle attention to detail and quick action. Below are a few tips for sexing marijuana plants.


