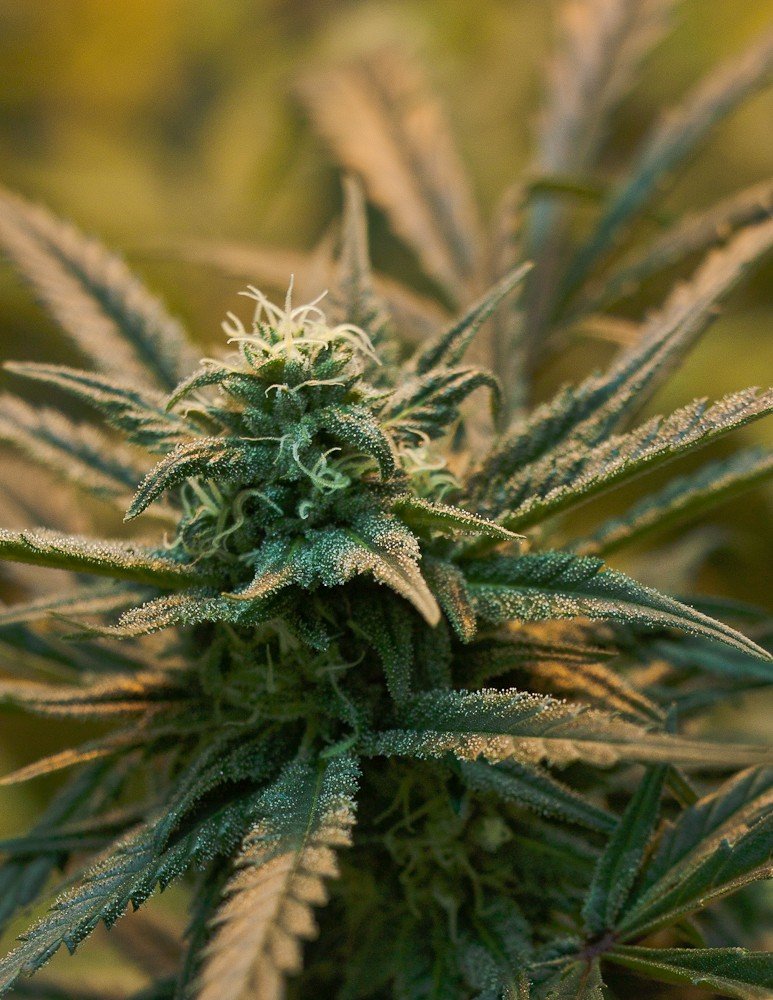
Quantcast
Channel: ilovegrowingmarijuana.com – The Joint Blog
Viewing all 94 articles
Browse latest View live

How To Identify And Prevent Bud Rot On Marijuana Plants

$
0
0

By Robert Bergman, ILoveGrowingMarijuana.Com

Bud rot is the worst nightmare for marijuana growers. It’s hard to prevent or identify and it will ruin your whole cannabis crop. Bud rot develops on the inside of the buds and spreads very quickbudrot. Even when your marijuana is drying, this mold will stay active so make sure you’re well prepared for this nasty fungus.

1. Prevention is better than cure

Bud rot, also known as botrytis cinerea or grey mold, thrives best when air is very humid and temperatures are low. It develops in the last phase of the flowering period, when air humidity should be between 30% and 40%. The problem is that humidity will increase as you water your marijuana plants. This is why you have to make sure not to give plants too much water and prevent excess spilling. If you water your plants from underneath, make sure you dose the amount so that it takes no longer than one hour for the plants to absorb all of the water. Also, water your plants when the lights have just turned on. Temperatures are then higher and water will damp or be absorbed quicker than when lights are out and your marijuana plants are ‘sleeping’.  In addition, make sure the space is very well ventilated and excess air is extracted. Fans must blow air between the buds and lamps, preferably an oscillating fan.

When growing marijuana outdoors, place your plants in sunlight and in an area where wind creates enough ventilation. Morning dew can then damp quickly evaporate or you can help get rid of dew by gently shaking it off. The best case would be to place your marijuana plants indoors at night so that cold air and damp won’t harm them too much. By placing plants slightly higher than the ground for better ground temperatures, you help your plant’s resilience against diseases. You can also treat your marijuana plant with Teldor from Bayer. But only use this on the stem during flowering phase so the wax coating does not rinse off easily.

2. Recognizing marijuana bud rot

Keep an extra close eye on your marijuana plants during the last weeks of the flowering period. Always look for diseases and abnormalities, but especially for bud rot. You’ve come too far to see a good cannabis crop go to waste after all the hours you’ve spent cultivating your plants. You can recognize bud rot by inspecting the small one finger leaves growing from the buds. If these are green, you’re in the clear. If these have a yellow or brown color, chances are you have bud rot. These leaves let go easily when removed and do not look healthy. If you see this kind of leaf, remove it immediately and bend open the top carefully and look inside and see if things are looking OK.

3. Intervention

Once you’ve identified bud rot on your plants, you need to act quickly. It might be hard on you, but you have to remove any and all infested buds. Bud rot spreads very quickly and it will ruin your entire crop. Use disinfected scissors to cut out rotting buds. Also be very careful not to touch healthy buds with your infected hands. Check every day for bud rot and cut out infected buds immediately!

Want to know more about growing marijuana? Check out the FREE book Marijuana Plant Care for more information!

The post How To Identify And Prevent Bud Rot On Marijuana Plants appeared first on TheJointBlog.


This is How You Create Strong Marijuana Plants

$
0
0

By Robert Bergman, ILoveGrowingMarijuana.com

All cannabis plants start as seeds, and they all require water to germinatecannabisplant properly. Each seed contains a full, little plant that has a root, stem, and a couple of leaves. There are also enough nutrients in the seed for it to survive the first portion of its life. During germination, these vital nutrients (proteins, carbs, etc.) are transformed into glucose, which all plants need to for growth.


1. Let the seeds soak in water that is 65°F (18°C)  until they split open and roots appear

When seeds achieve a nice moistness level, they will enlarge and split open. A single root will grow downward with gravity out of that split. The root will always grow down no matter what and the stem will always grow up.

Placing your seeds in water ensures that they have achieved the proper moisture level for the process of germination to begin. The seeds will not take on excess water and drown until about 2 weeks after they have cracked open (you will have already transplanted them into soil by then).

When you fill your glass with water, simply put it in the living room so that it shifts to the temperature of the environment. Tap water is fine, but don’t give the seeds any extra nutrients because they already have everything they need. The seeds will crack open in between 2 and 7 days. Make sure to replenish the water in the glass every other day. Start transplanting when the roots reach  0.1 to 0.2 inches (3 to 5 mm) in length. Download my free marijuana grow guide to learn more about marijuana seeds at this link

2. Place your seeds in a ½-inch hole in small pots with seedling soil

The nutrient level of the seeds is already adequate, so you should use a soil with fewer nutrients to start. Soil made specifically for seedlings and clones that has low quantities of nutrients is ideal. Plants are very susceptible to nutrient burn at this stage if you give them too many nutrients.

The pots should be filled halfway with the seedling soil. To make the half-inch hole, use your finger tip or a pen. Each seed should have its own pot. Since the roots will always grow down, you don’t have to worry how you place the seeds in the soil.

Place the seed in the hole, and cover it up with the soil. When you spray the soil with water, it will tamp down on its own. Avoid pressing the soil. The germination process will continue until the plant starts to surface within a week. The taproot will produce other root offshoots so that the system is strong.

3. Use a plant sprayer to moisten the soil

Water is responsible for both life and germination, making it the most vital component early on. It is extremely important that you give the plants plenty of water and keep the soil moistened.

Plants that don’t receive enough water will compensate by not growing to full capacity. This is largely to increase the plants’ chances of survival. Of course, too much water can cause the plants to lose out on valuable oxygen. Leaves will start to wither and the marijuana plant and growth medium will become more susceptible to diseases and bacteria.

The soil needs to stay adequately moist (not too dry and not over-soaked). The seedling won’t use much water, but a lot of the water evaporates fast. This is the major reason why seedlings should never go on a windowsill or near a heater. Spraying the plants 1 or 2 times throughout the day should be plenty.


4. Put pots 2 inches below CFL tube

Other than water, light is another vital component for the plant’s growth. Light and water help convert carbon dioxide into oxygen and glucose—necessary resources for plant growth. This is referred to as photosynthesis.

When plants don’t receive adequate light, they will form fewer side branches and will elongate abnormally. This stretching helps marijuana plants grow taller to grab enough light in nature. Plants that receive adequate light will grow wider (not taller) and produce a flurry of side branches with a ton of buds. Light should be kept on 24 hours per day and the room should have a consistent temperature of around 72° Fahrenheit.

The pots should be placed under a cool white CFL light at a distance of 2 inches. These tubes don’t create that much heat, they’re energy efficient, and they use the ideal light spectrum for seedlings. Seedlings require about 3 to 5 watts each. When the plants surface after 5 to 10 days, they will need all the light they can get to grow optimally.


5. Moisten the soil with a water sprayer twice a day until seeds germinate

Creating the ideal climate is also important for germinating the seeds under ideal conditions. CFL tubes don’t produce that much heat, but they will keep the soil warm. You can keep the distance between the plants and the bulbs to a minimum, but if the temperature exceeds 77° F, then you should move them farther apart or cool down the area.

Soil moisture is important to ensure that the seed disposes of the water. Avoid feeding the seeds until the initial leaves make it through the soil. This happens after about 5 to 8 days. Be patient and just check the moisture level of your soil without feeding any nutrients.


6. First signs of the seeds

As soon as the seedlings pop their heads out of the soil, it’s vital to inspect the distance between the plant and the light. Adjust the lights if the temperature goes past 72° Fahrenheit or the leaves start receiving excessive light. The soil also needs to stay moist. The leaves on the plants can absorb water, so continue spraying them 2 times per day.

Again, this early stage in life makes the plants susceptible to damage from negative conditions. Don’t use a lot of nutrients and make sure the lights stay on 24 hours to produce a reliable climate. Avoid touching the plants and do not take away the seed skins from the leaves

The plants need to grow and develop sturdy root systems. Big green leaves are capable of absorbing ample light and converting it into energy. Healthy root systems allow plants to take in plenty of water and nutrients. The plant is just starting to form the base for the remainder of its life, so it’s important that they receive proper, diligent care.


7. First two internodes

When the initial internodes start to form, you can feed your plant with root-stimulating foliar nutrients. Start the plants off with a small dose as the developing roots can’t withstand higher concentrations just yet.

The plants will start to grow rapidly (about 0.5 inches per day). Inspect your plants each day for signs of nutrient surplus (e.g. burned leaf tips).


8. Transplant into bigger pots when roots grow out of the bottom

The roots will start to grow out of the bottom of your smaller pot at which point it’s time to transplant. The plant will become rootbound and stop growing if you do not transplant.

To recognize the roots, look for white tips poking out of the bottom. Check for the roots each day and start giving your plants grow stimulator, which is high in nitrogen. More about nutrients on this link.


9. Grow you plants outdoors or under MH/HPS lights

If everything went as planned, then you have strong, healthy plants that will eventually produce high yields. A good start in life means that the plants will be less susceptible to bacteria, diseases, pests, and the effects of harsh weather extremes. Plants that are healthy can better absorb water and nutrients and will develop a faster metabolism for better yields. If you email me a photo of your seedlings, I will publish them on my site.

These plants can now grow outdoors and will thrive in a wind-free location that gets a lot of sun. The plants will also do better in a big container (15 gallons) on a stool. This keeps away any interference from animals like rabbits or snails.

As you have seen, it’s not very hard to grow healthy marijuana plants. Everyone has their own technique and I’d like you to share your own knowledge on my forum. If you need high quality marijuana seeds, check out my seed shop for a wide selection strains at this link. The special offer for all Super Skunk, White Widow, and Super Silver Haze orders is still in effect (buy 5, get 5 free!). And we do ship to the States!

Robert

The post This is How You Create Strong Marijuana Plants appeared first on TheJointBlog.

7 Ways to Keep Pests off Marijuana Plants

$
0
0

By Robert Bergman, ILoveGrowingMarijuana.com

For centuries, gardeners have had to deal with pests of many varieties. Whetherbird they are birds, insects, mammals, or even other humans, cultivated plants seem to have a target on their backs. While humans don’t really eat raw cannabis, some pests certainly seem to like the taste. If left unchecked, an infestation can end up ruining your crop. At the same time, using harsh chemical products to repel the pests can be harmful to you later on. To avoid all that, we have compiled a list of some safe and effective repellents (and other safety precautions) to keep bugs away from your plants.


1. Only use sterilized soil or fertilizer. The problem with unsterilized soil is that it can contain the eggs or even larvae of some common marijuana pests. If you grow your marijuana in that soil, you will be in for a rude surprise when those eggs hatch or those larvae start to grow up. This is particularly bad for indoor growers because there are no natural predators inside your house.

2. Use natural predators. Of course, if you’re growing marijuana outdoors, you can make use of a few pest predators. Ladybugs are notoriously beneficial to have around your outdoor marijuana plants because they love to prey on larvae and other potential pests. You should also encourage birds to nest in the area because they often like to snack on some pernicious marijuana pests. Put out some bird houses or a bird feeder to get birds to come around. Just make sure that they stay away while the seeds are germinating because many birds do enjoy the taste of a marijuana seed. Download my free marijuana grow guide at this link and for more outdoor growing tips.

3. Grow companion plants. Interspersing the marijuana garden with a few naturally repellent plants is certainly a good way to keep the predators away. Although the THC that marijuana produces acts as a natural repellent in its own right, it is often not strong enough to repel all plants (especially in the early stages of life). Particularly pungent plants like geraniums and marigolds will keep many leaf-eating insects and worms at bay. You can even plant some onions to ward off bigger pests like deer or rabbits.

4. Use the urine of your pests’ enemies. This might sound like a joke, but it actually works and it’s actually feasible. Many mammals like deer have keen senses of smell and if they detect a hint of bear or puma urine, they will want to stay as far away from your marijuana plants as possible. That’s because they won’t want to enter territory that a much larger predator has been roaming around in. The same is true for rabbits and fox urine. You can buy these scents at many sporting goods or outdoor shops.

5. Build a fence. If bigger animals are a problem and the scent of their enemies doesn’t deter them, then you might need to try building a fence around your plants. Obviously, many marijuana growers don’t have this luxury and it’s really only something that people growing on private land can do.

6. Create a repellent force field around the plants. With a permethrin-based repellent, you can keep insects away from your plants without using the synthetic spray on the plants themselves. Simply spray a ring on the ground about 6 feet away from the plant. Any bugs that come into contact with the permethrin will die or just evacuate the area.

7. Use custom organic repellents. Many growers have opted for pungent, organic repellents to keep pests away from both their indoor and outdoor plants. Concoctions like cinnamon oil, clove oil, and coriander oil have all had relative success without causing any damage to the plant. You can easily spray these repellents directly onto the cannabis leaves with no fear of any adverse reaction. Of course, different cannabis strains might have different reactions to any homemade organic repellents, and you should always test the repellents on an inconspicuous section of the plant to make sure no harm is done.

The post 7 Ways to Keep Pests off Marijuana Plants appeared first on TheJointBlog.

6 Tips for Sexing Your Marijuana Plants

$
0
0

By Robert Bergman, ILoveGrowingMarijuana.com

One of the most annoying things about growing marijuana is that you have to accurately determine the sex of your plant.plant Many growers want to keep their female plants from being fertilized because it is the only way to ensure sinsemilla buds. These buds don’t have seeds and they will have ample THC by the time the harvest comes around. Even then, many marijuana growers just like to get the males out of the garden because they don’t produce that much THC. Determining the sex takes a subtle attention to detail and quick action. Below are a few tips for sexing marijuana plants.

1. Look at the growth patterns. During vegetative growth, every plant, regardless of sex, will start to flourish. As the plants age, however, you will begin to notice subtle differences in their sizes. Some marijuana growers have even noticed certain signs early on that can help you determine the sex. Females tend to have more complex branching when they progress from the seedling stage to the vegetative stage. Males, on the other hand, tend to be slightly taller and less filled out. Of course, the last thing you want to do is pull plants out at this early stage, but this can help you get an idea so you know which plants to watch later on. (Note: marijuana plants grown indoors under artificial light don’t usually exhibit these tendencies).

2. Males mature faster than females. This is one of the most common ways to determine sex on sight. Males will generally reach sexual maturity about two weeks before females. The males will start to grow rapidly and they will be taller than their female counterparts. They will also have these “false buds” which are actually pollen sacs. The reason the males grow taller is so that the pollen can drop down on to the female reproductive organs. This occurs whether you’re growing marijuana indoors or outdoors.

3. Males have flowers, females have pistils. Obviously, all marijuana plants have flowers at some point, but, if you can’t differentiate between male and female just by height, then flowers and pistils are good indications of sex. Those false-bud, pollen sacs will eventually open up to form little yellow or white flowers. Any female plants will not have these. Instead, they will have hairy, whitish pistils that will be sticky enough to trap the pollen dropped from those flowers. If you wait this long to identify the sex of your marijuana plants, then it’s probably too late to get any sinsemilla buds. Even so, you can still remove the male plants to make room for the continued growth and cultivation of the female plants.

male

Male marijuana plant.

female

Female marijuana plant.

hermaphrodite-marijuana-plant1

Hermaprodite marijuana plant

4. Clone the marijuana plants to determine sex. This is really the only foolproof way to determine the sex before the plants achieve maturity. You simply have to take a cutting from any number of plants. Place this cutting into potting soil and let it grow on its own for a few days. Then, force flowering with a 12-hour period of darkness and 12-hour period of light (the clones must be separate from the host plants). Because the clones share the exact same DNA as their host, they will have the same sex. Once the clones go into the flowering stage, it will be easy to determine their sex and the sex of their hosts. Make sure you keep track of which clone came from which host so you don’t get things mixed up.

5. Identify where the plant sprouted during germination. Although it might seem a little strange, some marijuana growers have discovered a method that helps them sex the plants just after germination. If the sprout comes out of the top or bottom of the seed, it is generally a female. Side sprouts generally turn out to be male. While this hasn’t been scientifically studied, growers who have used this method report a 90% success rate. Even so, you shouldn’t use this knowledge as absolute fact. Let the plants grow a little and try to notice any distinctly male or female signs. Don’t just throw away the marijuana  seeds if they sprout out of the sides. Instead keep track of your predictions so you can make an informed decision later on.

6. Sometimes, you’ll have hermaphrodites. Growers can occasionally end up with some hermaphrodites which are basically plants that exhibit both male and female reproductive capacities. These can be difficult to determine right away because they can send you mixed signals. Hermaphrodites can also come about as a result of environmental stress, making their sex increasingly hard to determine. If you start to notice flowers and pistils on the same plant, try pruning off the flowers to ensure that the marijuana plant doesn’t self-pollinate (or pollinate other surrounding females). Read more about male, female and hermaphrodite marijuana plants.

Have you had any strange or successful experiences with sexing your marijuana plants? Let us know in the comments below. Also, let your friends in one these details by sharing the article on Facebook, Google+ or Twitter.


Last thing: if you buy feminised marijuana seeds, you do not have to sex them at all. No weeding out male plants. Have a look in our seeds webshop. (We ship to all countries, for free)

The post 6 Tips for Sexing Your Marijuana Plants appeared first on TheJointBlog.

Growing Cannabis At The Cellular Level

$
0
0

By Robert Bergman, ILoveGrowingMarijuana.com

Therecell are millions of varying kinds of cells that make up a cannabis plant. The different cell types vary in their function, and they all work together as a sort of cell team. Cells for the leaves, roots, vascular system are just a few examples of the different cell functions and types. Everything you do with your plant has an effect on the cellular plane as well. Outside factors (i.e. changes in sunlight or temperature) also come into play at the cellular level, affecting the plant’s functions. Consequently, it is very important to have an understanding of cell responses, so you can alter the conditions for your plant to make sure it has a perfect and healthy response.

To better understand the goings-on of cell processes, we will proceed with this article via an analogy. Instead of using the tricky cell part names, we will look at it as the different parts within a power plant and a factory. It works as follows: The factory houses the receival of raw materials, the checking of these materials, and then the production of a finished result. A power plant provides the energy for the factory’s production, plus there is communication between that factory and the other factories. All of this is controlled and kept working in harmony by the head office. These types of facilities and their processes can be compared to the cell processes themselves, and will help you learn and understand what exactly is going on at the cellular level of your plants.  Download my free marijuana grow bible at this link and grow like a pro!
The different sections of the “factory” of the cell:

Factory building
Power plant
Production, packaging, and shipment
Warehouse
Management
Factory Collaboration


Factory building
The factory walls are the equivalent of the cell’s walls, which are kept firm because they are mostly made up of cellulose. When you walk up to the factory’s walls, the security guard from the receiving department greets you. This department is the plant cell’s membrane, which (like a security guard) is the gatekeeper between the wall’s outside and inside. It works as a sort of border between the two and will not allow everything inside. Certain substances (nutrients, for instance) are invited inside without question while the gate remains shut for dangerous or unusable ones. In some cases, the cell purposefully expels or draws in certain things.

The membrane not only functions as the gatekeeper, but also works as the communications department. This department is what lets the cell remain in contact with the world around it. This allows the plant to react accordingly to changes in its surroundings. If the surrounding environment becomes warmer, the plant needs to cool down. This is done via communication from the cell membrane to the stomata, telling it to open and allow the plant to enhance its level of evaporation.

In some circumstances, such as when the cell is old or damaged, the membrane might start to leak, which can lead to issues in function. Specifically, harmful outside substances could be allowed to enter through the normally solid membrane. Consequently, the cell could die, which will harm the plant’s wellbeing and your cannabis quality.

The last part of the factory building is its floor, which is the equivalent to the cell’s cytoplasm. Cytoplasm is made up of water, other elements and some chemical compounds of different types (i.e. proteins). It is in liquid form and houses organelles or cell organs. It provides a means of transport between organelles.


Power plant
Like a power plant is the source of energy for a factory, the sun provides the fuel for the plant’s functions. An integral part of energy usage in a plant is chloroplasts, which make sugar out of solar energy (which is called photosynthesis). This chloroplast is an organelle that distinguishes plant cells from animal cells. Photosynthesis helps store the energy for later use for production, maintenance, cell division, and respiration.

Like a power station, the mitochondria handle this stored chemical energy. Although a starch build up can compromise the photosynthesis process (transforming chlorophyll into a warehouse), cell chloroplasts actually store starch. Without any light, plants can transform starch into sugars, thus reversing the photosynthesis process. For this reason, plants should not actually receive 24 hours of light per day.


Production, packaging, and shipment
Just as every factory has an assembly line, every cell has an endoplasmic reticulum (ER). This large cell is housed in the cytoplasm and connects to the cell nucleus. Ribosomes make the ER have a roughness in the part close to the nucleus. Ribosomes function similarly to the assembly line workers by consistently making proteins, which are formed in the nucleolus. The nucleolus is located inside of the nucleus. Meanwhile, the smoother part of the ER, located further away from the nucleus, temporarily holds the proteins.

These parts of the ER that store proteins break away and go to the Golgi apparatus, which functions as the factory’s packaging and shipment department. All that happens here is the receival and more processing of the materials, and then shipping them back again. Lots of the proteins are transferred to the cell membrane. This is due to the fact that it consistently requires maintenance; without it, the cell can not function well. Some materials that are created for the cell’s exterior are sometimes made by the Golgi apparatus. One example of such a material is plant hormones, which go on to have an effect on a different area of the plant.  Download my free marijuana grow bible at this link for more information about plant hormones.


Warehouse
The cell’s vacuole contains water that stores waste products and nutrients. In our analogy, the vacuole is the equivalent of the warehouse. It increases tension in the cell walls by pressing against them, thus making the plant stiff. If the vacuoles don’t have enough tension, the plant wilts. Since vacuoles need water to create the tension, too little water will make your plant wilt.

Acting as a repository, the vacuole also plays an important part in the plant’s fast responses to changes in water level. Potassium is moved from the vacuole to cell fluid when the stomata quickly closes as a response to too little water. The stomata can also have fast responses to light, temperature, and carbon dioxide levels, which means the plant is able to optimize photosynthesis and have self-defense against outside threats.

If you see some of the bottom leaves of your marijuana plant start to turn yellow and die, don’t panic. In reality, this is a sign of an important process taking place. Like a factory, waste is produced in the cell processes. This waste is kept in the vacuole. When large amounts of waste need to be disposed of, it is deposited into the vacuoles of a leaf. This leaf is discarded by falling off the plant.


Management
Just as a factory’s goings on are organized by its management, the cell’s processes are guided by its nucleus. All of the genetic information (DNA) is held in the nucleus. This DNA, though identical in all cells, contains switches that turn specific genes on or off. These “settings” decide what the cell’s function is.

Cells have the potential for any function when they are first formed. Leaf, root, or storage cells are all a possibility at first. Specialization occurs only after the switches in the DNA are enabled or disabled, which are in part determined by the plant hormones and plant-produced sugars. The sugars sometimes have a hormonal effect as well.


Factory Collaboration

Leaves, roots, and buds are formed from tissues, which are made up of millions of cells. Since all the cells need to cooperate in order to achieve this, communication between them is essential. For this reason, the hormones act as information envoys.

Occasionally, a cell needs to be reassigned to a new function. One such instance is when a plant is cut since it requires new roots for the new plant to be able to soak up nutrients and water. That means that, shortly after the plant is cut, it will develop new cells that have no specialty, but will turn into root cells. Additionally, the stomata on the leaves will close up. This helps the cutting’s water supply avoid evaporation; the plan will use the energy from its reserves until the plant’s new roots have formed. This is one instance of plants adapting to sudden or extreme changes in their environment by means of extreme organizational changes.

I hope this analogy has expanded your comprehension of the plant’s cellular processes. Thanks for reading! Please write any comments or questions you might have in the comments section below. If you need more tips on growing marijuana, check back to my blog and download my free Marijuana Grow Bible.

The post Growing Cannabis At The Cellular Level appeared first on TheJointBlog.

Growing Cannabis Outdoors; A Detailed Guide

$
0
0

By Robert Bergman, ILoveGrowingMarijuana.com

outdoorIf you smoke heavily, you will only need the harvest from between five and seven large female marijuana plants for the entire year – assuming they were grown properly and are as healthy as possible, of course. When translated into choosing the best place for growing cannabis, this means that you do not need a terribly large amount of land to grow all the plants you could want.

This is not to say, however, that a usable growing area will be easy to find. There are lots of different things you need to remember when deciding where to grow your marijuana outdoors.

If you are looking for the perfect place to grow marijuana outdoors, it should look something like this: some sort of clearing that is isolated and near a riverbank, with nutrient-rich soil that does not have rocks in it, that is reached by the sun throughout the day. The most important factor to consider when choosing a location, of course, is always your own security. The following topics will be covered in this chapter:

  • Examples of some outdoor grow sites
  • How to find the best places to grow marijuana outdoors
  • How other plants can help you
  • How to camouflage your marijuana plants
  • How to protect your marijuana grow site
  • Guerilla marijuana growing

 Examples of some outdoor grow sites


How to grow cannabis in your garden?

Growing marijuana in a garden
Few people have the luxury of growing marijuana in their own personal garden, but this is always the ideal option. You’re never far from your plants, you can water them accordingly, and keep prying or suspicious eyes out of your garden as you see fit. Even so, the smell of marijuana can be quite pungent, so keep the plants away from your neighbor’s fence.


How to grow cannabis on your balcony?

Growing marijuana on a balcony
Like a garden, a balcony gives you an area to grow your marijuana where you have easy access. Unlike a home garden, balconies can be seen from the road or by neighbors who are also on balconies. You can use a frosted plastic film to keep your plants out of sight but still in the sun. The film can also reduce the spread of the marijuana scent. In the northern hemisphere, you should place your plants facing south (if possible) so that they get the most sun during the day.


How to grow cannabis on a public rooftop?

Growing marijuana on a roof terrace
A roof terrace gives your plants a full day’s worth of sun, but odors and strong winds can be an issue. Small amounts of wind are ideal for thicker stems, but constant windy conditions (like those found in coastal locations) aren’t good for marijuana plants. If you live in a windy environment, try to find windshields.


How to grow cannabis on a public rooftop?

Growing marijuana on the roof of a vacant building
Some people don’t have access to their own roof terraces, balconies, or gardens, but another roof can work just fine. If you can find a vacant building in which the roof is not easily accessible by anyone but you, then you might have a perfect urban location for your outdoor marijuana grow. It might be enticing to grow on roofs that are difficult to access but not vacant. Just be aware that appliances or equipment like air conditioners might be up there and they will need periodic maintenance.


Download my free marijuana grow guide at this link for more outdoor grow sites


How to grow cannabis in a forest?

Growing marijuana in a forest
One of the best places to employ guerrilla marijuana growing is in the forest. It’s always a fun journey hiking through woods, trying to find a location with ample sun, a nearby water source, and a long distance from any trails or paths. If there are no streams, you might be able to dig (sometimes only 3 feet deep) to find groundwater. In most cases, however, the soil in the forest is quite acidic (low pH level). Pine forests and meadows have a problem with acidic soil. Sometimes, you might be better served digging a hole and putting in better, nutrient-filled soil. You might also be able to take 15 gallon pots filled with good soil.


How to grow cannabis on a riverbank?

Growing marijuana on a riverbank
Rivers or streams have what is called a riverside that features a whole host of tall, green plants like canes or nettles. The soil in these locations is usually so wet that you don’t have to water the plants. You can add a nutrient solution every month or so for better nutrient quality. These locations are also hard to get to. You may have to swim across a river to get to your guerrilla marijuana garden, because there’s a good chance that most other people wouldn’t be willing to do that.


How to grow cannabis in an open field?

Growing marijuana in an open field
This might seem like a bad idea considering how wide open a field is, but if you camouflage your cannabis with other plants then you can get away with it. You get all the sun your plant could need in a location that’s easy to access and difficult to tell what it is. Heathland is usually quite acidic, but if the field has grass or any other plants, marijuana should do well.

If you see nitrogen-loving nettles, then the soil is full of nitrogen, one of the most important macronutrients for marijuana growth. Even so, the best course of action is to start your plants off in a pot or a hole that has fertilized soil. Keep the plants near brambles and nettles so that they’re not obvious to the casual onlooker.


How to grow cannabis in a corn field?

Growing marijuana in a corn field
Although you likely don’t own a corn field, they are ideal locations for marijuana growth. If you plant in the middle of all the corn, your plants get tons of sun, privacy, and all the water and nutrients they need. If you know another breeder who has a corn field and plants marijuana surreptitiously, then ask them if you can plant there. Otherwise, it’s pretty risky to try guerrilla farming on a stranger’s land.

You will still need to grow your plants outside of the corn field first. You’ll have to wait until about the end of May or the beginning of July when the farmer stops working the field with a tractor. The marijuana plants should be between 10 and 15 inches in height when transplanted to the field. Plant in the middle of the field and allow for about 3 to 5 feet of space between the plants. Mark the rows where your plants are located with an object or by gauging another natural item. Within a matter of weeks, corn will grow up to several feet tall, which will conceal your marijuana plants nicely.

How to find the best places to grow marijuana outdoors


How to find the best place to grow cannabis outdoors?

First and foremost, you need your location to be safe from discovery. As soon as your marijuana plants are discovered by someone else, it will immediately be unusable because you will lose your entire crop. If you have it on your own property, be sure to keep yourself safe by placing it in a location where you can easily deny your knowledge of it being there. If the plants are in a remote enough location on your property, you will probably be able to get by claiming you had no idea it was growing there.

Some growers use self-made greenhouses in order to hide the types of plants that are in there. Although this takes away your chances of denying any knowledge of it, it greatly decreases the chances of your crop being discovered.

Although more exposed to the outside world, public land is probably the safest choice. This can keep the marijuana plants from being traced back to you. Even if your crop was discovered and destroyed, at least you would be safe from legal action.

Avoid it being discovered in the first place by choosing a location wisely. Make sure it is in a spot that does not have high traffic (such as a hiking trail or other attraction), and where hunting does not take place. Keep a special eye out for places that someone looking for psilocybin mushrooms might stumble upon, and avoid such locations – a mushroom hunter would be more than happy to take your valuable marijuana plants for themselves.

Another potential problem could be new development. You wouldn’t be the first one to choose a spot, ready the soil, and spend valuable time and money preparing the water systems, and then come back a while later only to see the land completely destroyed by bulldozers and construction.

Download my free marijuana grow guide for more outdoor marijuana growing

Some cannabis growers are particularly lucky because they live in a place where the law allows growing so they can focus their efforts on the more important aspects: soil, water, and light. Here’s a short list with requirements for an outdoor grow site:

1. Sun
More sunlight correlates to larger plants and higher yields. If you plant in the shadows, at least make sure your plants get a few hours of sun each day.

2. Water
Marijuana plants will be able to thrive in most areas, except those that are uncharacteristically dry. Of course, if you have more water at your disposal, then the plant can absorb more nutrients. Creeks, rivers, or other nearby sources of water are ideal. Bringing in your own water is also an option.

3. The Right Amount of Wind
The gentle touch of a small breeze helps develop strong root systems, but lots of wind can cause damage to the marijuana plant. Choose a location that is not too windy.

4. Nutrient-Rich Soil
Nutrients are the lifeblood of marijuana plants, so try to find an area where lots of other green plants are growing. Marijuana will likely do well in that location.

5. Easy Access
Seeing your plants at least once per month is reassuring and also important. You will be able to tell if they have incurred a bug or pest problem, lack of nutrients, water deficiency, or whatever else.

6. Keep It Hidden
Easy access is good for you, but not for others. Try to keep thieves or potential police informants off your trail by planting your marijuana garden away from the road or other locations that people frequent. Corn, canes, and tomato plants can also camouflage the marijuana.

 How other plants can help you


Tomato and cannabis plants growing outdoors

You can easily use the growing cycles of other plants to help guide you for what you can expect with your marijuana plants. You should look into the growing behavior of other summer plants, such as corn or tomatoes. Corn is generally your best bet. This strategy gives you the chance to ask around for tips (about corn or tomatoes, for example) without needing to explain that you are actually gathering the information in order to grow cannabis.

Because the harvest time is similar for these other plants and cannabis, information about other plants can turn out to be invaluable for you. You can gain helpful insight into growing climates and harvesting time, and you should plant your marijuana seeds around the same time as these other plants should be planted.

Besides weather and the harvesting time, talking to others about plants with the same growing season will help you out with other factors you may not have considered already, including subjects such as rainfall and types of pests. You can’t believe everything you hear, of course, but conversations like this could even help for finding a good growing location. Just make sure to be discreet about it.

Other plants can also help  from just being near where you will grow your marijuana plants. Tall plants, especially green ones, will help hide the cannabis. Many growers (such as ones in an urban location), put flowers on their marijuana plants so they will resemble a different local plant. Although the flowers are just attached loosely, they are good enough when seen from afar, so they are a popular method for rooftop growers. Sometimes combining the flower technique with something else, such as tying down a few of the branches, will be enough to mask what you are really growing in your garden.

Download my free marijuana grow guide for more outdoor growing tips

Other growers use or intentionally place other plants around their cannabis plants. Green plants with lots of leaves such as jasmine and spider plants can do the trick nicely. Bushes or bamboo have also been used by growers to make a sort of shield around their plants.

Be careful with these methods, though: cannabis plants that need to compete for sunlight with taller plants around them will spend all of their precious energy on growing very tall, meaning they will grow very quickly and will soon be taller than the other plants. To avoid this, simply make sure that you are not planting the other plants too close to your marijuana. This especially applies if you are using the shield technique.

All in all, make sure to be taking in a lot of information not only about marijuana plants, but about native and local plants in general. Learn how and when they grow, and use this to your advantage. It will help you grow healthy, strong marijuana plants, and will allow you to have a successful crop without any theft or loss of your plants. Any information about your local system will help you reach success, so start with the local plants.

How to camouflage outdoor marijuana plants


How to camouflage outdoor cannabis plants?

One of the best ways to hide your planted marijuana is to originally plant them beneath trees or beside bushes. Another tip is to make sure you have only a few plants in one specific area, just in case one clump of your plants are discovered. This way, you won’t lose your entire crop if they are discovered.

You can actually bend and prune your marijuana plants so they look like other types of plants, therefore lessening the chances of their discovery. If you bend the stems in a horizontal way while doing this, all the better: your plants will get more sun, making the yield even bigger.

Although planting marijuana plants underneath trees seems like a good way of keeping them well-hidden, you have to be sure that they will still get at least five hours of direct sunlight, as well as much more indirect light. The more light there is, the more you will get from your harvest.

Some growers attach silk flowers (click here for some examples) to their marijuana plants to camouflage them better; otherwise, planting them close to similarly colored and sized plants could do the trick. Make sure these plants won’t die earlier than your plants, however, as that would make your plants be even more obvious.

The key is to keep your marijuana plants from being visible from people just looking around. Your work is not done after planting them, however; you will need to take other steps, such as changing your route each time when you go back to your site, as well as covering your tracks as you go. Don’t make it obvious that you have been there: keep the environment looking like it is untouched by anyone.

Even if it is less convenient, try parking your car in a place where there are multiple cars around. It will help if you have your source of water near to the planting site; carrying 100 gallons of water will look awfully conspicuous if anyone sees you. Have a reasonable explanation for you being in the location, and even bring along “props” to further prove your story.

Download my free marijuana grow guide at this link and learn to grow like a pro!

All of this is equally important to consider during the planning process before you plant your cannabis. You might even want to try on a smaller scale for your first season so you can be sure that you will harvest the few plants that you do grow.

More than anything, be careful who you tell about your operation. Even if you do tell someone that you are growing marijuana, you must always keep yourself from telling them where they are planted. For most people whose growing sites are in really well-hidden areas and are nonetheless discovered, their only mistake was bragging about it to someone who then reported it. Despite all your efforts until now, nothing will matter since your entire harvest will be gone. Never underestimate the importance of security!

How to protect your marijuana grow site


How to secure your cannabis grow location?

Security issues can vary quite a bit, depending on the geographic location – it can even vary quite a bit within a single country. Vancouver growers of marijuana have an easier time of growing outdoors than US growers who live in states located in the southwest do. Growers in Hawaii need to take extra measures to make sure that their plants remain a secret, but people living in Australia don’t have this same problem, due to the fact that they have a lot more space and a cultural lack of concern by the neighbors.

So how can you protect yourself, wherever you are? First and foremost, learn your local marijuana laws, and the consequences of breaking those laws. In certain places with stricter laws and penalties, the risk simply might not be worth it. Some states in the US have zero tolerance, which means that if they discover you the minimum penalties will be extreme, including jail time and hefty fines. In other locations, such as some European countries and a few states in the US (especially California), the penalty depends a lot on how much was discovered.

In most cases, your stash will be taken away from you and you will be fined, but that is it. You will need to do the research yourself and make a well-informed decision about what is right for you. In any case, keeping your security a priority is crucial. If nothing else, it will protect your crop from being discovered and taken from you. The fewer people who know about it, the less likely discovery is. When in doubt, simply don’t tell anyone at all.

Aerial surveillance and infrared photography are some of the types of technology that American police forces will use to try and find secret cannabis plants. They are often successful, discovering hundreds of thousands of plants each year. The US government funds efforts to find and get rid of cannabis plants. Don’t let this intimidate you, though: they are mostly focused on much larger planting sites, which are far easier to find than personal gardens or just a few plants in one location. Some state laws allow the police to take away entire properties of the grower, then auction everything off. This money is then used to buy state-of-the-art surveillance equipment, firearms, vehicles, and other tools used to find and destroy all the marijuana in their precinct.

This is why security should be your first priority from the beginning. Think hard about where you will grow your marijuana: growing away from your own property is always the best choice for your own safety, as it is going to keep the crop separated from its grower. Choose a remote location, away from any hikers, hunters, or other foot traffic. Other (legal) plants should be used for extra coverage – you can even plant some nearby to cover up your cannabis plants even more thoroughly.

Guerilla marijuana growing


Guerilla cannabis growingBecause the law enforcement in certain areas is becoming more and more aggressive, marijuana growers have had to come up with some very creative ways of avoiding discovery. Guerilla farming is one of those methods. It is the way that most growers who plant their cannabis plants outdoors have had to adopt.

The concept is simple: keep your plants from being discovered, and keep their discovery from leading to you.

Various tactics have been used to achieve a successful, undiscovered harvest. Some growers raise their marijuana plants amidst tree branches. Some growers used buildings that have been uninhabited for a while, growing their plants on its rooftop. While these locations would be quite difficult to be discovered, it does lead to some difficulty when trying to reach them to water the plants. If you are growing your cannabis plants on some inaccessible patches on the side of some hills, you might have to carry water to each plant individually.

Given the risk you are taking in losing your time and money (not to mention legal consequences), be sure to keep your security the first priority when choosing the location of your planting site.

Thanks for reading. Please leave comments or questions below and don’t forget to download my free grow bible.

The post Growing Cannabis Outdoors; A Detailed Guide appeared first on TheJointBlog.

How to Increase Your Marijuana Yield

$
0
0

By Robert Bergman, ILoveGrowingMarijuana.com

bud2For every marijuana grower, achieving a high final yield is the ultimate goal. In an ideal world, this yield will be high despite less effort, time, and money being used.

There are a number of factors that can negatively affect your yield, so as a grower you need to always be aware and ready to combat these things to ensure a great yield.

What are the main things that can affect your yield? They are light intensity, pruning or training, nutrients, climate issues, and the harvest time. All five of these factors can lead to successful yields, but if they are not handled correctly, then they also have the potential to devastate your marijuana crop. You, therefore, need to be well informed and ready for any unexpected hurdles that might come your way.

More than anything, the genetics of your marijuana plant are going to have the greatest effect on the final yield. Make sure you choose a strain with a high potency and yield to begin with so you ensure that you can maximize your crop to an amazing extent.

Increasing light intensity

Increase light intensity in cannabis grow room

You will know your plants are having an issue with the intensity of the light by the way they are growing. For instance, if your plants are in their vegetative phase and are not receiving a high enough intensity of light, they will “stretch” upwards toward the source of light. This can lead to large spaces on the stem between nodes and leaves, or perhaps even growing tall enough to fall over.

Tall, lanky plants are not the type of plants that are going to get you a high yield – bushier plants will. Once these stretched out plants have reached their flower phase, it will be difficult to get them an adequate amount of light to increase their bud growth. To keep it simple, more light intensity leads to more (and bigger) buds. It’s, therefore, easy to understand why it’s such an important factor for your marijuana garden.

Light is by far the most important factor that can affect any marijuana plant. It is absolutely essential for the flowering phase of your marijuana plants, although many new growers don’t fully appreciate how much increasing the light intensity during that final stage is going to help their end yield. The process photosynthesis is fed by intense sunlight, which creates sugar, which is used for the flower growth of your marijuana plants. Uninterrupted darkness is equally important since this is the time that the plant can produce and let off the hormone florigen – if it doesn’t do this, it will not flower.

If your plant is experiencing a problem due to the improper intensity of the light, there are several methods you have at your disposal to combat the problem. Generally, more intense light leads to bigger and fatter buds. This, of course, means a greater yield – and greater success for you as the grower. It’s especially important to have high amounts of light intensity during the flowering phase since this is when your plants are going to grow their buds as much as possible. This is the easiest to achieve if all of your plants are the same height, with lots of colas close together. This is more or less impossible to achieve after your plants have already entered their flowering stage, so if they have grown unevenly then you will just need to work your hardest to make them receive intense light nonetheless. The tricky part about increasing the intensity of the light in your grow room is to not simultaneously increase the temperature of the room, as the plants need to remain cool during their flowering phase.

One simple way of increasing the intensity of light in your grow room is to move the light so it is positioned closer to the plant. This has to be within reason, of course, so as not to burn your plant’s tips. Remember: the best way to increase the size and potency of all the buds is to have each one exposed to direct, intense light.

In general, there is a low chance of you giving your plants too much light. Marijuana plants use up lots of light in the wild, so to surpass the point of too much would be surprising. As long as the light isn’t too close to your plants, you won’t have a problem with light levels being too high.

Although it might not seem like it is directly related to light, CO2 is another important factor that comes into play. CO2 enables your plants to take in more light than usual. Unless you are reaching the point of the light being too much for your plants, however, adding extra CO2 into the grow room is most likely a waste of time. If you are reaching this point, CO2 will be extremely beneficial to your plant’s end yield.

If you are planning on adding CO2 to your grow room, make sure you seal off the area completely so you can pump in extremely high amounts of CO2. This density of CO2 is dangerous for humans, so don’t walk into the room with the excess CO2 without taking proper precautions first.

Increasing yield by pruning

pruned cannabis branches

If your plants are receiving uneven amounts of light, meaning the tops of your plants (which receive the most direct sunlight) are growing more rapidly than the bottom sections of your plants, you may want to look into pruning and/or training your plants.

This factor goes hand in hand with light intensity since it will have a direct effect on the coverage and distribution of the light. Training and pruning allow your plants to become bigger and wider, and it is free and relatively simple to achieve. You can either top your plants (which utilizes the method of taking off the tops of your plants) or use Low-Stress Training or LST. Many growers prefer LST since it keeps the stress levels of your plants to a minimum (as the name suggests). LST’s idea is to coax your plants into growing flat and wide rather than tall and thin. It uses bending to achieve this goal.

If you are planning on using LST, you should start when the plant is still quite young. The ideal shape of a plant that has undergone LST is easiest to accomplish if you start from a young age. Instead of bending and tying your plant, you can also use a screen or netting to guide your plants’ growth to being more flat and wide. This method is referred to as Screen of Green.

If you want to train your plant a little bit differently, you should look into the method of Supercropping. This can be used on its own or to accompany another training technique. It is a way to force plants to bend when they don’t want to bend.

As far as actual pruning goes, the most popular method for marijuana growers is called Topping. Another popular method is FIMing the plant. Both methods include removing growth from the end of the main cola. If you do this at a young enough age, the result will be that the plant will stop focusing all its energy on this one cola. Instead, it will focus on the other colas that are full of buds instead. This ultimately leads to a higher yield.

Using the best nutrients

Use the best nutrients- cannabis nutrient burn

If your plants have sudden leaf discoloration, curling of the leaves, death of the leaves or other strange symptoms, the cause could easily be from too little (or too much) of one nutrient. There is the common identifiable problem called “nutrient burn” that shows your plants are receiving too many nutrients. Just like people shouldn’t fill their plate with multi-vitamin pills, you shouldn’t bomb your plants with nutrients. Too many nutrients make both humans and plants sick.

Your plants’ leaves are always the first place to show nutrient problems. Therefore, if the leaves of your plant all look similar and bright green, you can rest assured that there is no problem with your plant.

Contrary to what some new growers might assume, adding more nutrients will not automatically make your plant more well-nourished. You need to know exactly how much of each nutrient your plant is going to need, and during which phase. Sound complicated? That’s because it is.

Lots of growers have developed the bad habit of giving their plants too many nutrients. Another common mistake is when growers who haven’t fully educated themselves mix lots of nutrients together before adding it to their watering solution, without really knowing why or what they are feeding their plants.

There is a tendency to add too many nutrients.  Too many nutrients lead to poor plant health (therefore doing more harm than good).  You need to make sure you don’t let this happen.

Nutrient deficiencies are also detrimental to the health of your plants, so you need to find the balance between the two extremes. It is actually generally the safer option to err on the side of too little nutrients. If you use bottled nutrients, we recommend using only half of the suggested amount of nutrients. Simply do not raise nutrient levels unless you are noticing specific changes in your plant (i.e. leaves turning yellow at the base). You can also do it when you realize one particular plant uses a lot more nutrients than its neighbors. You will be surprised by how different the ideal amounts of nutrients are from plant to plant.

In general, it’s better to have fewer nutrients during your plant’s final 2-4 weeks before the harvest. If you see leaves dropping during this time, do not automatically assume it is a nutrient deficiency and start adding more nutrients. This will actually slow down your plant’s bud development, therefore resulting in a lower yield. Fewer nutrients during this time will also allow your buds to get rid of any residual “nutrient taste” that sometimes comes with plants that have been receiving too many nutrients. Don’t be afraid to allow some of the leaves to yellow, die, and drop off – it allows your plant to focus its valuable energy on high-quality bud growth instead.

The best way to avoid nutrient problems altogether in soil-based mediums is to form your own compost to make super soil. It can be totally organic and will give your plant every nutrient it needs throughout its entire life. You won’t need to worry about deficiencies and toxicities and can instead use your time and energy elsewhere.

Create the perfect climate

Create the perfect climate for your cannabis plant

If your plant (or one particular spot on the plant) begins turning brown and wilting, you can be relatively certain that the excess heat is to blame. Excess or sudden cold will also lead to slowed growth and other negative consequences, so make sure to avoid this at all costs.

You need to maintain a steady, healthy climate for your plants to produce their maximum yield. A too high or too low temperature will result in a poor yield, as will improper levels of humidity. Make sure to always keep the temperature of your grow room within a certain, consistent range to keep your plants from slowing growth or having other negative side effects. If you keep the temperature and humidity level at the right spot, the final harvest will be rewarding. Even the smell and potency of the buds will be improved, so don’t forget about this crucial factor when it comes to maximizing your yield.

Harvest at the right time

Marijuana_Plants-3You will know you have chosen the wrong time to harvest if your buds aren’t fully ripe, or if they’re unusually small. Chances are, you cut your potential by about 25% by harvesting too early. If you wait too long, however, you will also lose some potency and smell.

There is a small window of time that is ideal for harvesting the buds of your marijuana plants. This window of time is between two and three weeks long. You need to ensure that you are waiting long enough to allow the buds to ripen completely. The final two or three weeks before the harvest can make a world of difference – buds can grow up to 25% more during this time! This is why it’s very important not to harvest earlier than the optimum window.

If you are trying to get a specific high from your buds, you can alter the harvesting schedule a bit. Buds harvested earlier generally have a buzzy high, best for smoking during the day. Later harvests lead to a high that is more relaxed couchlock feeling. Decide when you will harvest based on your personal preferences.

Marijuana plant symptoms

cannabis symptoms- heath burnt leaves

Leaf symptoms:

– Leaves curling upward
– Leaves curling downward
– Base leaves yellowing
– Heat-burnt leaves
– Spotting of leaves
– Yellowing or browning leaves
– Dropping and dying of leaves
– General discoloration (red, grey, brown, yellow)

Plant symptoms:
– Tall, “reaching” plants
– Lanky plants
– Nutrient burn
– Browning and wilting

While these five factors are the most common ones that can affect your marijuana plants’ end yield, they are by no means the only factors that have an effect. There are plenty of diseases or conditions that could affect your plants without you influencing it at all, so you need to be well-educated in terms of potential obstacles. If you do your homework and are proactive about your plant care, you will be finely rewarded. Check out our Symptom Checker for more plant symptoms.

Choosing the right genetics

Choose the right genetics- quality cannabis seeds

While there is nothing you can do after you have already purchased and planted your seeds to affect this, it is still worth mentioning that genetics play a key role in your plants’ final harvest. Your particular marijuana strain is going to affect the growth, size, and potency of your buds in the end.

The good news is that most strains that you are likely to buy these days have significantly higher yields and potencies than past strains. They are also generally easier to grow, and this is just getting better and better as time goes on.

Many beginner growers will pay the cheaper price for strains that are not high in quality. Although their intent was to save money, in the end they will actually get less value for what they paid because the end yield will be disappointing compared to a high-quality strain’s yield. This is why it is important to invest in high-quality genetics from the beginning.

There are different versions of high-quality strains, of course. Some strains achieve a higher yield, sure, but others have been bred specifically to achieve other useful characteristics like height and bushiness. Others were bred to have buds that are extremely potent or fragrant, meaning the yield itself might be lower, despite a higher quality bud.

Therefore, no matter what you do in regards to the other factors that affect your precious marijuana plants, you need to start things off right with a good strain. Do your research so you know exactly what that strain’s tendencies and expectations are. In the end, you will be glad you did.

Thanks for reading. Please leave comments or questions below and don’t forget to download my free grow bible.

The post How to Increase Your Marijuana Yield appeared first on TheJointBlog.

Diseases on Marijuana Plants, and How to Treat Them

$
0
0

By Robert Bergman, ILoveGrowingMarijuana.com

potplantDiseases on marijuana plants and infections usually create the worst possible issues for your plants. They have a tendency to be much harder to treat than pests. Diseases in your plants will usually come in one of two major categories: fungal or bacterial.

Fungal diseases are often caused by environments that are too damp or humid, or places which lack airflow. Fungal spores float around in the air looking for a suitably damp place to root down and if the environment is right, that suitably damp place might be on your cannabis plant.

Bacterial infections are often sneakier and harder to notice. They are spread by a number of different possible vehicles, ranging from insects and humans to rain and unclean soil or substrate. Bacteria can sometimes get into a plant and then leave it mostly untouched unless the plant is weakened by external stresses, at which point they can quickly take down the whole plant.

Proper treatment of a fungal or bacterial disease requires a knowledge of the potential symptoms, which we’ll list below. As always, the best defense against disease is prevention. Do your best to create an environment which is healthy for plants and inhospitable for fungus and bacterial growth.

Algae

Algae on cannabis

Hydroponics systems are water-based, and without proper care, they can become havens for algae. Both cannabis and algae thrive in nutrient-rich water environments, but you really don’t want them to be sharing the same space. Algae will live on the roots of your plants, and thus deprive your cannabis of the nutrients necessary for the plant to develop properly in a hydroponics system.

Not to beat a dead horse, but your best defense is always preventative. Do your best to minimize the potential for algae growth before it occurs by the taking the proper precautions beforehand. Because algae and cannabis have similar requirements of water and light, it can be difficult to do this. The easiest way is to make sure that no light reaches the roots of your plants. Use an opaque, dark material to block out the light. If algae begins to develop, clean it out right away. Read more about Algae on marijuana plants

Bud rot

Gray mold botrytis on cannabis

Bud rot (also gray mold or botrytis) is one of the most damaging of the possible infections your marijuana plants can face. It eats every part of the plant, not bothering to distinguish between buds and flowers or stalks and stems. The infection can spread very rapidly, so you want to take precautions to avoid letting gray mold take root in your plant’s environment. The disease prefers a cool but relatively humid environment. Keeping the temperature in your grow room above 70 degrees Fahrenheit will help, and make sure to monitor the humidity constantly so that it doesn’t get too wet.

Download my free marijuana grow guide at this link for more about diseases

Another step can be to change clothes or wear protective gear before going into your grow room. The spores can attach themselves to clothing fibers and then release in the grow room if the environment feels appropriate. If all else fails and your plants develop gray mold, there a few different soaps and sprays you can use to help mitigate the damage and treat the plant. Marijuana Plant Protector is the best solution. Read more about Bud rot on marijuana plants

Leaf septoria

Yellow leaf spot on cannabis

Leaf Septoria (also known as yellow leaf spot) produces yellow spots on the leaves of your cannabis plants. It’s a fungus which usually pops up on outdoor cannabis plants after they have been exposed to both heat and recent rain. The yellow spots initially develop on the lowest leaves of the plant and then work their way upwards. In the worst cases of Leaf Septoria, the entire leaf will turn yellow and begin to crumble. Generally, however, the leaves won’t die off, and the plants will survive.

Despite the fact that it isn’t usually lethal, yellow leaf spot can heavily inhibit the growth of the plant and its eventual yield. You can prevent yellow leaf spot by keeping the soil well-aerated and applying a fungicidal  compound to your compost. If you still have trouble with yellow leaf spot, you can apply baking soda as a reactive measure. Read more about Leaf septoria on marijuana plants

Powdery mildew

Powdery mildew on cannabis

Powdery mildew on marijuana is a spore based fungal problem that can affect both outdoor and indoor marijuana gardens. The spores are transmissible through the air, and being carried by wind means it can be fairly difficult to protect against. It’s also a very sneaky fungus because the spores can lie dormant in the soil until conditions are just right for them to start growth. Usually, this is when the environment is warm and highly humid.  Powdery mildew also occurs frequently when the cannabis plants are too close together, and there isn’t enough airflow. An overcrowded grow room unnecessarily risks damage to your plants.

You can recognize powdery mildew by its white color. It will cover the foliage of the plant and inhibit the photosynthesis process. If your plants suffer from powdery mildew, there are a number of safe naturally based sprays you can use (including milk and apple cider vinegar) to help deal with the problem. Mold control also treat powdery mildew. Read more about Powdery mildew on marijuana plants

Fusarium

Fusarium on cannabis

Fusarium on marijuana is another fungal issue. Instead of eating the foliage, however, fusarium damages the root systems of your cannabis plants. Thankfully, hydroponics systems aren’t affected by fusarium since it requires a soil-based substrate to survive in. Usually fusarium causes wilting in the plant or a more generalized root rot. Like some of the other fungi, fusarium will sometimes lie dormant in the soil for long periods of time, just waiting to strike.

If fusarium does begin to take hold in the root systems of your plant, there’s very little that you can do to treat it. First of all, it’s very difficult to spot until it’s too late. Second, although indoor growers can help prevent fusarium by using sterile soil, there’s no way to be sure it isn’t present outside in nature. Read more about Fusarium on marijuana plants

Verticillium wilt

Verticillium wilt on cannabis

Verticillium wilt on marijuana is fairly similar to  fusarium wilt, except that it is mostly like to appear in soils that are improperly drained or overly full of nutrients. The first signs of verticillium wilt are drooping and yellowing foliage. The fungus will also cause the stem to turn a dark brown at the base, where it makes contact with the soil. These sorts of fungal diseases are nigh impossible to treat, so it’s of the utmost importance that you practice preventative care.

Try to make sure that your soil or substrate has proper drainage, so that verticillium wilt won’t rear its ugly head. Because there’s really no way to cure or treat verticillium wilt, make sure that you rotate your crop if you have issues with it, otherwise it will just keep coming back. Read more about Verticillium wilt on marijuana plants

Root rot

Root rot pythium on cannabis

Root rot, also known as pythium, is a fungus that will live on the roots of your marijuana plants. As you can imagine, this isn’t good for the roots, and if it’s not good for the roots, it’s definitely not good for the plant. Root rot can occur both indoors and outdoors, and in a wide variety of substrates, including the water of hydroponics systems. Initial symptoms include wilting of the plant, and a change in the color of the foliage to brown or yellow. Since these symptoms can be caused by a wide variety of issues, you’ll need to check the roots themselves if you want to verify the source.

When a plant is infected by pythium, the roots will begin to change color and eventually the outer layer of the roots will be shed to reveal stringy, weak inner core. You can help keep your plants root rot free by fastidiously cleaning the hydroponics system and making sure that the substrate drains properly. Remember, preventative care is key! Read more about Root rot on marijuana plants

Damping off

Damping off on cannabis

Damping off of marijuana seedlings isn’t actually a disease, instead it’s the plant responding to the presence of a disease. You’ll notice when you see damping that the plant seems like it’s wilting— it may resemble overwatering, but really it’s the roots which causing the issue. Damping off usually occurs in cannabis seedlings. The plant itself will develop lesions before actually dying entirely.

Again, preventative care is the only real way to deal with damping off and other fungal disease-related problems. Usually, plants won’t be able to bounce back from damping off, and so it’s up to the grower to prevent it from happening in the first place. Read more about Damping off on marijuana seedlings

Thanks for reading. Please leave comments or questions below and don’t forget to download my free grow bible

The post Diseases on Marijuana Plants, and How to Treat Them appeared first on TheJointBlog.


How to Pass a Marijuana Drug Test

$
0
0

pic

By Robert Bergman, ILoveGrowingMarijuana.com

Because marijuana is not yet treated like other legal drugs, workers need to be constantly worried about whether or not they will be denied employment because they didn’t ‘pass’ a marijuana drug test. This is especially true if you use marijuana for its medicinal purposes. Medical marijuana patients will need to have a prescription that is recognized in the eyes of the law.

Urine drug test

If urine is found to test positive for the presence of a drug, a medical review officer is called in who will decide if a justifiable medical reason exists for the results of the test. If the worker has their prescription for that drug, such as urinecodeine or oxycodone, it is excused and allowed by the company and the law. This normal procedure does not generally apply to medical marijuana, unfortunately.

Since marijuana is not recognized according to US federal law, even states that allow the use of medical marijuana will generally have companies that don’t allow the use of marijuana. Occasionally states give employers the opportunity to grant exceptions for the allowance of medical marijuana users with legal prescriptions, but there are only a few employers who accept that offer.

It’s important to know whether or not your company has medical marijuana policy exceptions. Do it discreetly, of course. If they do not, there are still a few steps you can take to pass the test. Then again, there are also plenty of techniques people use to try and get around the positive results of their test, all of which are highly ineffective and a waste of time.

Useless attempts
Making excuses for your positive drug test is not going to get you anywhere. Although false positives do very occasionally happen, the chances of your employer believing you over the lab are extremely slim. Don’t bother arguing about it.

Some people try using the legally prescribed drug for acid reflux, called Protonix. Its FDA label clearly states that false urine tests are a possibility while taking this drug. Unfortunately, nowadays there are backup GCMS (gas chromatograph-mass spectrometer) tests that will eliminate the possibility of this leaving you in the clear. If your employer is private, however, then they probably don’t use this backup procedure anyway, so it’s possible you could get away with it.

Back in the day, hemp food items could be enough to register a false positive on a drug test. After this was becoming a problem, however, the hemp industry increased their limits and standards, and now anything you find in the grocery store won’t even be picked up by a drug test.

Some people attempt to use the “secondhand” smoke of marijuana to be the reason for their positive results. This is so unlikely,  that it will never be believed. In order to have been exposed to enough secondhand smoke from marijuana smokers to have it give you a positive drug test result, you would need to have been in a sealed location with half a dozen smokers for numerous hours. Plus, all of them must be smoking heavily the entire time. Sometimes, however, people do consume the odd marijuana-based edible treat, such as at a party. Whether this will be an acceptable excuse to your employer, remains to be seen.

Marinol prescription
Like marijuana, Marinol has high levels of THC and, therefore, a legal prescription for it should be enough to account for the levels of THC in your urine. Despite Marinol being FDA approved medication, you are required to inform your marinolemployer of your use of Marinol before the test. One way to inform them is by listing it when you list any prescription drugs that you are currently taking. Occasionally employers won’t even let their employees operate while taking Marinol, under the justification that it makes you unfit to work, so be sure to know your employer’s policy for such things.

Technology has undergone some upgrades, and nowadays testing is getting more precise. This means that some tests are emerging which can distinguish the difference between marijuana and Marinol, so this technique needs to be used with caution.

Clean it out
The most effective way to pass the urine test is to stop the consumption of marijuana beforehand. Some places of employment have random drug testing, of course, in which case you will not be able to plan it this way ahead of time. Pre-employment drug tests, however, should enable you to have enough time to flush out your system.

There is no set rule on how long before the test you need to stop smoking. If you smoke once, 2-4 days before the test, it probably won’t be picked up. People who smoke on a daily basis, however, have a build up in their system that will require a longer amount of time to clean out. Aim for 2-3 weeks without any marijuana, with one full month being the only way to ensure that it is not picked up. In rare cases, frequent, heavy users have tested positive as long as two months after they stopped smoking.

Diluting
Some people try the method of diluting their urine, either through drinking lots of water just before the test or taking a diuretic beforehand. While these could indeed dilute the urine, this can only go so far. If urine is too watery, the labs will probably know. It will be rejected in this case, which means they will most likely ask you to retake the test. Dilution is not a good method to rely on.

Tampering with the urine sample
If you are truly desperate, you can try tampering with the results. Proceed with caution, however, as people are expecting a certain number of tamperers to try something. The most common way is to have clean urine with you. It needs to remain warm (between 90 and 98.5 degrees Fahrenheit) to be effective. You can get it from a friend or even buy it from a company online, although some states don’t allow it.

Many people swear by the method of bringing a container (generally something flexible, like a balloon) filled with their friend’s urine and transporting it within their underpants so as not to be found out. They then pour the urine into the cup and handed that cup as their own. The key is to keep the container with you afterward so there is no evidence and to bring something like a nail clipper to puncture a hole in the urine containing balloon.

Some desperate test takers use a chemical adulterant to change the composition of their urine sample. Although these are detectable, they are often not detected because labs don’t have the money to thoroughly check every sample in this way. False negatives could possibly be achieved by the use of bleach, vinegar, ascorbic acid, salt, soap, and even eye drops. In fact, eye drops are the most effective option and often go undetected — not including adulterants manufactured specifically for this cause. Chemical adulterant companies boast high success rates with their clients.


Blood testing

Blood Sample

Blood Sample

Blood tests can measure exactly how much THC is in your body at the time. Blood tests only show the most current information, and won’t display past marijuana usage like urine samples will. When marijuana is smoked, it only takes ten minutes for the THC levels to get their highest in the bloodstream. In just a few hours, these levels drop significantly. THC levels of ingested marijuana (i.e. through edibles) will take longer to kick in, and won’t be felt as strongly.

Blood tests are most often used to check into a drivers’ conditions after a car accident to see if they were under the influence. People are considered ‘impaired’ when they have a THC level of more than 3.5 to 5 ng/mL, which are most common within the hour after smoking. People who have built up a tolerance due to frequent use will most likely not be impaired at this level, however.

Despite these facts and studies, some states are trying to establish a zero-tolerance law for driving with marijuana in your system. Others are just trying to establish a numerical limit of some sort, despite the fact that people with a higher tolerance will not be hindered by reaching this limit. Incredibly, there have even been studies to show a person with ADHD could not pass a driving test without having marijuana in his or her system. Therefore, marijuana and alcohol should not be considered to have similar effects on driving.


Hair testing

hairHair testing does not measure any current use of marijuana — it only measures marijuana intake from a few months prior. It involves taking a strand (or strands) or hair and analyzing it to see what kind of drug metabolites are present in the hair (and, therefore, were present in the body). Hair tests are generally more sensitive to other drugs such as cocaine, and they pose more of a threat to frequent users than they do to one-time or occasional users. Hair testing is a particularly frustrating form of drug testing because it sheds no light on how the worker would be performing at the time of testing. Nonetheless, it remains an option for employers to use for their drug testing.

Shampoos
There are shampoos available that specifically help marijuana smokers pass hair drug tests. They do a fair job of removing external residue from drugs, but, unfortunately, the metabolites themselves were built into the follicles of the hair and, therefore, cannot be removed. They are located within the shaft of hair instead of the outside, making it (so far) impossible to separate the metabolites from the hair. Therefore, shampoos are not proven to be a reliable way to pass a drug test.


How to deal with drug tests

Drug testing can be a particularly tricky issue for those who are using marijuana for medical reasons, especially when it is already legal in their state. These days drug tests are normal and accepted by wider society for the workplace, and some states have adopted the use of drug tests for driving accidents. This is even though they clearly do not understand the facts of how the drug and tests both actually work.

Urine is clearly the trickiest test of them all, as it detects marijuana for up to a month (and occasionally even longer) dealafter a person’s last use. In the case of marijuana users, it is rather unfair because other drugs (meth, heroin, cocaine, and alcohol, to name a few) are not detected for as long.  Alcohol, in particular, is difficult to detect and is generally not tested for in the workplace.

A urinalysis doesn’t actually measure the THC in the urine, but rather the psychoactive cannabinoid metabolites that remain after the high from the THC has disappeared. The levels of the metabolites increase steadily for a few hours right after smoking, and then very slowly decrease over time. Generally, this requires several days for people who don’t smoke more than a couple times per week. For frequent users, however, it will require several weeks since the cannabinoids and metabolites both build up within the fat of the body over time.

The strange thing about urine testing is that no studies show that its detection of the metabolites actually indicates a person’s current level of intoxication from the marijuana. It only shows that a person has smoked marijuana in the past several weeks. In any case, they are still used as an excuse to fire someone or prevent them from working.

Urine drug tests are not able to detect the difference between the occasional, previous use and current, impairing use. Despite that fact, the testing goes on everywhere and as frequently as ever. In reality, feces is where most of the THC in the body is deposited, but drug companies are unsure of whether this is a testing market worth pursuing or not. For everyone’s sake, let’s hope not.

Thanks for reading. Please leave comments or questions below and don’t forget to download my free grow bible.

[Editor’s Note: You can find information on saliva drug tests by clicking here.]

The post How to Pass a Marijuana Drug Test appeared first on TheJointBlog.

The Difference Between Indica, Sativa And Hybrid

$
0
0

By Robert Bergman, ILoveGrowingMarijuana.com

budNot all marijuana strains are alike. You have probably already heard of sativa and indica, and even the hybrid strains, but do you know what the differences between them are? They are three distinct categories of specific traits that even the most experienced growers don’t know about.

Sativa and Indica have been on the books since the 1700s, but the hybrid didn’t come until some time later. Sativas come from a temperate climate near the equator, while the Indica likely originated around present-day Afghanistan, specifically near the Hindu Kush area. The climate and weather conditions there are harsh — this is likely why they have a thicker protective coat of resin than the Sativa strains.

Nowadays, less is thought about the origins of the Indica and Sativa, and rather what those strains are well known for. This is why many marijuana growers prefer to grow one or the other.

Science and historical origins

bud2There is actually no official scientific evidence that explains the differences between Indica and Sativa strains of marijuana or even confirms that these differences exist. Nonetheless, they are widely accepted facts among the marijuana growing and using crowd.

There are some historical explanations for the beginnings of the Indica strain, also known as Cannabis Indica. It was first classified by Jean-Baptiste Lamarck, a French biologist, in the late 1700s. He also identified the fact that the plants were intoxicating. It was different from the regular hemp crops grown in Europe at the time, as they did not intoxicate the consumer.

Because of the differences between the European hemp crops (then actually known as Cannabis Sativa), Lamarck named his Indian discovery Cannabis Indica to establish its uniqueness from the European hemp. It was considered a therapeutic remedy of sorts in Europe during the 1800s and commonly used in Western medicine.


Indica traitsindica

Indica plants look short and bushy and have wide leaves and dense branches, making it the best strain for indoor grow rooms. They are known for their healing effects in regards to anxiety, insomnia, pain, relaxation of musclesheadache, and migraine relief, and muscle spasms. The high that comes from smoking Indica weed includes a sedating effect, making the smoker feel relaxed in their entire body. ‘Couch lock’ is the commonly used expression for this sort of high.

Indicas are considered the ‘nighttime’ type of marijuana. There is also a difference in scent between strains. Indica marijuana tends to have a scent that is strongly sweet or sour.


Sativa traits

Sativas are tall and thinner with looser branches and long, narrow leaves, making them suitable outdoor plants. They sativaare big. Some can grow as high as 25 feet tall — or more! They work well to combat the symptoms of depression, ADD, fatigue, and mood disorders. The high achieved with smoking Sativas is more uplifting, energizing, and often creative, as it focuses mostly on the cerebral region of the brain.

Sativas are considered the ‘daytime’ type of marijuana. They are well known for being an artist’s favorite type of marijuana to smoke, as it helps the free flowing of ideas for paintings and other type arts. In general, Sativa gives the user an overall feeling of contentedness, well-being, and ease, not to mention the fact that it helps spark and maintain focus.


Hybrid traits


Hybrids are considered to harbor different combinations of Sativas and Indicas, making thyrbidhem be considered the more balanced version of its two opposing counterparts. Hybrid strains can be anything from 70% Sativa and 30% Indica to half and half to 20% Sativa and 80% Indica. These different combinations are often used to bring out the various effects for a particular medicinal benefit.

In reality, Sativas and Indicas are usually some sort of hybrid with varying levels of each strain. Separating ‘pure’ from ‘hybrid’ is not a realistic way of distinguishing the two. To understand the effects you can expect from a hybrid plant or seed, it is much more important to know the background of your strain of plant rather than just the ratio between Indica and Sativa.


THC and CBD

The differences in the effects of Indica and Sativa strains come from varying levels of THC and CBD. Sativas naturally thcproduce high levels of THC, while Indicas instead produce high levels of CBD. The ratios of THC and CBD are what make the differences come out, but this can vary even within the strains. Sometimes you will find a Sativa high in THC or an Indica high in CBD, due to all the cross-hybridization that has gone on over the generations; therefore, the expected effects do not always appear.

The post The Difference Between Indica, Sativa And Hybrid appeared first on TheJointBlog.

How Long Does THC Stay In Your Body?

$
0
0

By Robert Bergman, ILoveGrowingMarijuana.com

Close-up of Marijuana Plant

Drug tests vary quite a bit, so this article is meant to provide you with general guidelines rather than all-inclusive facts, so please take the information with a grain of salt. Most people want to know exactly how long marijuana stays in your system so that you can effectively pass a drug test. Despite all the information we will provide you with, the best way to know for sure if marijuana is still in your system is if you actually perform a drug test on yourself. You can get cheap THC urine drug tests relatively easily.

Part of the issue with determining exactly how long the marijuana remains in your body is the fact that it depends greatly on how often you use marijuana. If it’s only once every couple months, for example, or even once per week, there is probably not a buildup in your body, meaning marijuana will leave your system within just a few days. If you use marijuana heavily or frequently, however, then it could take a month or even longer just to be sure that the marijuana in your system is no longer detectable. Always proceed with caution.

Urine

urine2Urine drug testing is the most frequently used method of all, making it the most relevant to you to know how to deal with it. It also has a longer detection time than a saliva test and is inexpensive to perform. For urine tests, weight, body fat, the amount of marijuana used, and how frequently you used marijuana all factor into how long the THC will remain in your urine.

After just a couple of hours from when you last smoked, THC appears in your urine. Without taking weight or body fat into account, a person who has used marijuana just once in their life will have a positive urine test for between 1-6 days. Whereas an infrequent user will show for 7-13 days, while a frequent user 2 weeks or more, and a heavy user for a month or longer. The longest anyone has reported is between 45 and 90 days after they stopped smoking. This applies only to the heaviest of pot smokers.

Technically urine tests check for THC metabolites rather than THC itself, which is the reason it can detect them in your system for a much longer time. The difference is that THC is the active ingredient that makes you feel high. THC metabolites, or THC-COOH, on the other hand, is the chemical that forms as the liver breaks down the THC. It remains in the for much longer periods of time than THC itself.

Passing a urine test
There are lots of methods employed by marijuana users who need to pass a marijuana test. Some work, others probably don’t at all. Some products called ‘urine cleansers’ are worthy of the skepticism surrounding them. You might as well drink a lot of water or other liquid just before the test, as it is a natural way to dilute the urine anyway. Proceed with caution, however; if it is too diluted, then the lab will reject it because it is unable to properly analyze the sample. Potentially it could be a solution to a tricky situation where you just need to buy yourself some time. This could work, assuming you would be allowed to do a retest (and haven’t smoked since your first urine sample).

Saliva

DNA-Entnahme bei einer weiblichen Patientin / DNA-Test from a human mouth

Saliva tests are not performed nearly as frequently as urine drug tests, but it’s still valid to point out that these tests show positive results within an hour after you have smoked. That being said, the positive result of a saliva test will only continue for about 12 hours after your last smoke, so it’s much easier to deal with than the urine tests.

Hair

THC only shows up in your hair a full week after your last smoke of marijuana. However, if you are undergoing hair drug testing, then it will most likely test for the last 90 days. This means, if you smoked at all in the past three months, it would be a positive test. This testing technique is generally inaccurate because sometimes THC does not even attach itself to the hair follicle at all, and it says nothing about your drug use for the previous week.

Blood

Blood Sample

Blood Sample

Blood tests are most commonly used when the authorities need to determine if someone who caused a driving accident was driving while under the influence. They display what the current effects of marijuana are on your body – since they are actually measuring the amount of active THC within your bloodstream.

THC absorption when smoking

When you smoke marijuana you are achieving the fastest way of absorbing THC. The chemical is actually detectable immediately once you inhale marijuana, with the levels of THC in your blood getting its highest just 9 minutes afterwards. Nearly as soon as you stop smoking marijuana, or at least after 15 minutes afterwards, the THC level in the blood drops significantly, dropping to significantly lower levels within two hours.

If you took a lower dose, in 3-12 hours after smoking, the THC levels would no longer be detectable. If you took a higher dose, however, it would be detectable for a longer period of time, between 6 and 27 hours. These results are only the case for people who do not smoke regularly.

The concentration of THC within your blood drops so quickly because it spreads out across your tissues and is metabolized by your liver quickly. The metabolites, which result from the liver’s breaking down of the THC, remain in eatingorgans of your body far longer than in your blood. This is why they show up in urine tests for much longer than blood tests.

THC absorption when eating

When you eat marijuana within an edible, the effects of the THC are vastly different. THC doesn’t kick in for several hours after eating a baked good with marijuana in it, and active THC levels drop within 25 hours. THC metabolites, on the other hand, took 50 hours to drop below detectable levels.

The post How Long Does THC Stay In Your Body? appeared first on TheJointBlog.

How to Grow Huge Marijuana Buds

$
0
0

By Robert Bergman, ILoveGrowingMarijuana.com

If you really want to maximize the outcome of your harvest, you are going to need to figure out a few things. You’ll need to be able to identify the type of marijuana plants you are growing, and then know exactly where and how to increase growth.

The bud of a marijuana plant is the prized appendage that appears after a plant enters the flowering stage of its life cycle. The leaves of the marijuana plant contain THC, but the buds of female plants are the most potent product by far. So as an individual grower, it’s important to focus a significant amount of attention on the buds of your crop.

If you do it right, you can accomplish incredibly huge buds with a high THC content. This guide will equip you with the knowledge you need to accomplish that goal. Keep reading and learn to grow huge marijuana buds


What are marijuana buds

marijuana buds

Before you can grow huge marijuana buds, you need to have a bit of background knowledge. For starters, a bud is the growth that pops up during a plant’s flowering phase. Although marijuana plants’ leaves also have a THC content, the buds have a far more concentrated amount. This is why the buds are the prize possession of any marijuana grower – they are the part of the plant that gets you high. While both male and female buds contain plenty of THC, there are some important differences that distinguish the two.


Male buds vs. female buds

fem

Plenty of people seem to believe that male plants don’t produce smokeable buds at all. While it’s true that female buds contain the most THC levels, male buds are also quite potent and able to be smoked. Male buds look like round flowers that are jam packed with pollen. Be careful that your males don’t pollinate your females because your plants will start producing seeds and less THC. I only grow males to produce seeds and remove them from my female plants.

Female buds will start showing up about two weeks later than male buds, and they start out as growths that are round, white-colored, and hairy. They show up on the very tip of every branch, as well as at the top of the plant. If treated well, the smallest buds on your female plants will grow to be longer than two inches.

Since female buds really are the cream of the crop, you are going to want to ensure that their buds get as large (and potent) as possible. The best way to achieve this is simply by getting them to grow at a faster rate. The faster they grow, the more time they have to become huge. Read the article Male or female marijuana plants for more information about sexing plants


Speeding up bud growth

gro

Once it has entered the flowering stage, the number one thing to speed up your plant’s bud growth is to remove any dying leaves. These leaves can be identifying by their yellowing color. They are a lost cause, and they are using up your plant’s energy and resources that could be focused on bigger and better things (namely, the buds). Take away the yellowing leaves to conserve these resources.

Instead of discarding these leaves, keep them and cure them properly. They have a high enough THC content that you can smoke them in case you run out of weed or while you are waiting for the big harvest.

Another way of saving and focusing your female plant’s energy is by topping it. This is a form of pruning that requires you simply cut off the topmost buds. You can take this bud home to cure and smoke already, and in the meantime the remaining buds will grow even faster. Some growers swear by this every year to achieve bigger and more potent buds by the time the harvest rolls around.


The best nutrients

grow

If you want your buds to be fat and juicy, you are going to have to spoil them a bit. Take special care of them during the flowering phase of the plant’s life cycle. What buds crave most of all is phosphorous, so try a mixture of 10% nitrogen, 30% phosphorous, and 10% potassium (commonly referred to as NPK 10-30-10) to curb those cravings. This high amount of phosphorous is rather difficult to come by in today’s world, but mixing wood ash with water should do the trick.

Of course, the other elements of keeping healthy plants in general also come into play with growing big buds. Proper amounts of water and light, along with temperature and good genetics will all affect the way your buds grow. Read the article Best fertilizers for marijuana plants for more info on nutrients. For the best result, you can just use the special formula from the Marijuana Booster system, a complete nutrient kit for up to 20 plants.


How much light

light

One of the most surefire ways of increasing your bud growth is by increasing the intensity of the light that is hitting your plants. If the light is not intense enough, your plants will have stretched themselves upwards during their vegetative state, becoming tall and skinny rather than short and bushy. This is not ideal for a decent harvest.

This is, of course, only possible to change effectively when you have an indoor grow room. If you are an indoor grower, it is a simple matter of moving the lights closer to your plants. If your plant has already grown uneven colas because of poor lighting during its vegetative state, it will be difficult to evenly and effectively distribute the light. The buds themselves should have direct exposure to the light for best results. Read more about Marijuana grow lights if you’re growing indoor.


Carbon dioxide

carbon

If you increase the amount of CO2 that your plant is receiving, you will essentially be “feeding” them more, allowing their growth to be sped up even further. Adding CO2 nicely complements increasing light intensity, since it basically is expanding your plant’s ability to use light. CO2 alone will not increase the yield. The more light and CO2 your plant gets, the more efficiently it will grow. This will also keep your plant from ever getting too much light since the added CO2 will increase its light capacity.

Although it’s pretty tricky to ever reach the light threshold, this is yet another way to “hack” your plant’s speed of growth. If you do decide to pump extra CO2 into your grow room, be sure to seal it off properly – although it works wonders for plants, high levels of CO2 can be very dangerous for humans. Read the article Growing marijuana with CO2 for more info


Temperature and humidity levels

temp

Temperature and humidity need to be at the right level for your plants to reach their highest budding potential. If the temperature is too high, your buds won’t have as potent of an aroma. Controlling your temperature can mean controlling the amount of potency and smell of your buds – when done properly. Make sure you pay special attention to your grow room’s temperature throughout its entire life cycle. If you do this, the results will definitely be to your liking. Read more about temperature or humidity


When to prune

OLYMPUS DIGITAL CAMERA

OLYMPUS DIGITAL CAMERA

Many growers swear by “training” their plants. Training means bending, netting, or topping your plants in order for them to receive light in the most effective and even way possible. Training can include forms of pruning, but you don’t always need to use a blade to properly train your plants.

“LST” (low-stress training) is a way of training that doesn’t include any cutting. It is a way of manually manipulating your plants to grow flatter and wider rather than skinny and tall. It uses bending techniques that anyone can do (but proceed with caution, as with anything).

LST is effective because it trains the plant to grow in a way that will maximize its intake of light. Every leaf that is exposed adds another source of energy to your plant so you can see why it is an effective technique. LST generally begins at a younger stage of life, before the plant has established its own shape. Another form of LST is called Screen of Green, and includes a net. The net (or screen) keeps your plants where you want them, and maximizes your plants’ use of the indoor growing space.

These forms of training can all be helpful in improving your plants’ yield, starting from an earlier stage of your plant’s life. Even if you are a veteran grower, trying a new training technique might be a great way of improving your yield significantly. Read the article How to prune marijuana plants for a list of all pruning techniques like topping, low stress trainging, super cropping and monster cropping


When to harvest

harvest

Ultimately, one of the most important factors in having the most potent and biggest buds possible is to harvest at the right time. You need to make sure you have let your buds become as ripe as possible before harvesting. Sometimes the amount of growth in a bud’s final two or three weeks can be as much as a 25% increase. In other words, by harvesting too early you could sacrifice a huge amount of weed. In general, the best time to harvest falls within a window of two or three weeks. Harvesting before this window of time would greatly reduce your overall yield, and will result in less potent weed.

You can also choose to harvest a bit earlier or later according to the type of high you would like to achieve. Earlier harvests generally get a more energetic buzzing high, while later harvests end up with a very relaxed high. For more harvesting tips read How to harvest marijuana plants


The best genetics

genetics

Once again, genetics is everything. No matter what you do to increase the yield, poor genetics will prevent a good harvest. If you did choose marijuana seeds with great genetics, you will be pleased with the end result. Luckily, most strains that people buy today generally have very high yields and potency, which would not have been the case ten years ago. These strains will grow with fewer problems and will end up with plenty of happy, fat, potent buds.

All in all, the most important way you can increase your yield is by investing early on in a high-quality strain. It may seem expensive, but the payoff is well worth the upfront costs. Do your research and pay the money, because the result will be amazing. Check my seed shop to make sure you buy high quality marijuana seeds

Thanks for reading. Please leave comments or questions below and don’t forget to download my free grow bible.

The post How to Grow Huge Marijuana Buds appeared first on TheJointBlog.

How to Make Cannabis Coconut Oil (and Cannabis Chocolate Chunks)

$
0
0

By Mary Grace, ILoveGrowingMarijuana.com

Cannabis coconut oil is super easy to make and has a high versatility. You can make your own healthy dark chocolates out of it, and even a delicious “special” dairy-free vegan cheese.

A wine and cheese plate has never been so much fun. And if you fit into the mold of a typical wine drinker, you may be able to pop along down the block and pick up some fine recreational chiba.

Best strains for making edibles

strainWhen making edibles, I would suggest using a purple marijuana strain. It has higher anthocyanin’s and will give your coconut oil a slightly different tinge rather than the true split pea green of normal butter. Having a high amount of anthocyanin’s in your oil means that you get anti-inflammatory benefits from using this strain when cooking. If you don’t have anything purple, most anything will do when making edibles, the yield and effects aren’t significantly different when using your premium kush verses your everyday greenery, so even seeds, stems, and small leaves, can be baked down to get the THC out.


Making cannabis coconut oil

oilCoconut oil is an effective way of extracting THC due to its high saturated fat content. It absorbs much more cannabinoids than butter or other oils. Making cannabis coconut oil is a great way to use up excess trim, kief or hash from harvest. Here’s my favorite way to do it.

Ingredients:
– 6 Grams of marijuana
– 1 Cup of coconut oil

Put coconut oil (super cheap on Amazon) in a pan and fill with enough water to float the oil. Allow the oil to liquefy. (Should happen fairly quickly due to coconut oil’s low melting point). Grind your vegetation. I prefer to use a hand-held grinder because it offers the fine fluff needed without getting too powdery.

Add your vegetation slowly, stirring it in until the mixture is completely saturated, feel free to add more water at any point that the mixture is becoming too oil heavy, or if your weed touches the bottom of the crockpot.

Keep your crock pot at 250-270 degrees, DO NOT EXCEED 320 DEGREES. Your active ingredients start burning off over 320 degrees. After 12-18 hours of boiling, use a strainer lined with cheesecloth to drain and wring out the plant matter. Store your oil and water mixture in a jar overnight.

You should see the oil rise to the top, separating from the water; this green-tinged oil is your final product, which can be stored for up to a year in a cool dry place. Coconut oil’s melting point is 76 degrees, so don’t be surprised if you open up your cupboard and find it melted one day.

Optional step: To remove some bitter herb taste, soak your buds overnight in water.


Marijuana Chocolate chunks

Cannabis-chocolate-ChunksMaking purp-nerp chocolates is one of the easiest ways to use your coconut oil besides, obviously, taking a big fat spoonful. They are delicious, can be used in a variety of recipes, and can be easily personalized to your own preferred chocolate tastes.

Ingredients:
– ½ Cup of coconut oil
– ½ Cup of cocoa powder
– ¼ Cup of honey [or agave if you’re vegan]
– A dash of vanilla

Melt the coconut oil in a double broiler, if you don’t have a double broiler, I used a small wok on top of a pot of boiling water, you could use any smaller pot and hold it over, or even a heat resistant bowl. Add everything else on top and stir until combined. Put in candy mold, or some sort of tray, if you want bark, you can line a cookie sheet with parchment paper and let it cool that way.

Personalize it with any spices you want to add, I used a grinder and added a bit of lavender while still warm, and when they popped out of the mold, dusted the top with a lavender/sugar mixture I dyed that great purple color, giving them the name purp-nerp choco. Add sea salt if you like it, or cayenne pepper for a back bite. Even just sprinkling pieces in with ice cream would be a wonderland. In this method chocolates are healthy, and open a door of delicious cooking opportunities.

Thanks for reading.

The post How to Make Cannabis Coconut Oil (and Cannabis Chocolate Chunks) appeared first on TheJointBlog.

Marijuana Eighths And Other Measurements

$
0
0

By Robert Bergman, ILoveGrowingMarijuana.com

For people who like to smoke weed but haven’t bought it before, or aren’t well versed in the measurement system for marijuana, this article will come in handy. Its purpose is to clear up the differences between grams, eighths, quarters, halves, ounces, pounds, and kilos.

The world of marijuana has an entirely new vocabulary that comes with it, so newcomers are often confused. Don’t be discouraged! There are plenty of newcomers now that the legalization movement is well under way, and this means that you are not the only one looking for answers. It’s always a good idea to buy a scale to make sure you’re aware of the weight of your bud. With different sizes and densities, it would be easy to mix up size and weight without using a scale.

gramGram

A gram is the typical unit for people looking to buy a small amount of weed, and it generally doesn’t get any lower than one gram. For most people, one gram of weed will last them a couple rounds of smoking, some a few days or weeks depending on your intake level. Some prefer to put the entire gram into one blunt, however, to achieve a more intense high.


eightEighth

Simply put, an eighth refers to around one-eighth of an ounce in terms of the weight of marijuana. Surprisingly, marijuana weight doesn’t quite follow the rules of other weights. An ounce of marijuana is 28 grams. A real ounce, however, is 28.375 grams. So technically speaking, an eighth should weigh 3.54688 grams — but in reality, it only is 3.5 grams. This isn’t to rip you off but rather is just a simpler way of measuring using grams (since only the more sophisticated scales measure hundredths of a gram).

In general, buying weed in eighths is going to be a better deal than if you bought it in grams. It’s also important to note that half-eighths are also a common measurement for weed dealers and buyers, weighing in at 1.75 grams.


quarterQuarter

A quarter is the equivalent of two of the above-mentioned eighths, and it consequently weighs around 7 grams. Quarters can also go by the name of ‘quad,’ and it is generally bought by people looking for an intense high or a long-term solution to buying their weed less often. People looking to share will also purchase a quarter of weed.


halfHalf

One-half refers to a half of an ounce, which, as logic dictates, is twice the amount of two quarters. If you want to get even more in depth with it, it is also the equivalent of four marijuana eighths, which is the same as the weight of 14 grams. This is a hefty amount that only huge party planners generally buy.


ounceOunce

An ounce is two halves, or four quarters, or eight eighths. It measures up to 28 grams and is often called by its first letter, ‘O’.  Buying an ounce is a huge amount of weed. This much at one time is rare, but it will provide you and all of your friends with enough product for a long while.


poundsPounds and kilograms

As is normal in the American Imperial System of measurement, one pound of marijuana is equal to sixteen ounces. This is the equivalent of 64 quarters, 128 eighths, or 448 grams. It’s a gigantic amount of weed. This is probably not the size anyone intending to smoke is going to buy, so they probably are already aware of how the measurements work.

Download my free Marijuana Grow Bible at this link and learn how to grow your own marijuana

In case you are not familiar with the Metric System of measurement, it’s important to note that one kilo (or kilogram) equals 1000 grams. It is the largest unit of measure in which you might buy weed (and is more than twice the weight of one pound). It is typically limited to traffickers. Simply put, amateurs or newbies wouldn’t be buying a kilo of weed.

The post Marijuana Eighths And Other Measurements appeared first on TheJointBlog.

The Complete Guide To Growing Marijuana Naturally

$
0
0

By Rebecca James, ILoveGrowingMarijuana.com

Remember when growing and smoking marijuana was widely considered a “hippy” activity?

Cannabis has a rich history as part of a movement that was focused on living peacefully without harming the planet or other human beings. Yet today marijuana is grown using chemical fertilizers and pesticides, not to mention vast amounts of water. Indoor growers use large amounts of electricity to power grow lights and pumps.

These practices are damaging to the environment and to your health. Who wants to smoke chemical laden buds? If you grow your own marijuana, there are many simple changes you can make to reduce your dependency on chemicals and fossil fuels.

This guide will teach you how to grow marijuana naturally.

Why should I grow marijuana naturally?

Why should I grow cannabis naturally

Growing marijuana naturally will:

Save you money
Imagine you didn’t have to purchase nutrients, pesticides, algae tablets or mite sprays?

Keep your grow stealthy
A natural grow is a stealthy grow. You are purchasing fewer products that could link you to a marijuana grow, and you will need to make fewer visits to your grow site.

Result in better tasting bud
Growing naturally boosts the amount of terpenes and flavonoids in your final product. These molecules provide the rich flavors and smells of great buds.

Help the environment
Growing marijuana naturally will reduce toxic runoff, conserve water and lower your carbon footprint.

There is no need to sacrifice yield to grow naturally. With a little attention to detail and some practice you can enjoy high yields without the cost or effort of growing with chemicals.

Is growing marijuana naturally the same as growing marijuana organically?

Is growing marijuana naturally the same as growing cannabis organically

Let’s define a few terms here before we get started:

Organic
This is a loaded word. Organic certification of fruits, vegetables and meats require strict adherence to federal guidelines regarding the use of chemicals, pesticides and antibiotics, among other things. Growing organically is expensive and not necessarily the healthiest or most efficient system.

Natural
This article is not about growing marijuana organically. It is about growing marijuana in an efficient and environmentally conscious way. By natural I mean using sustainable, renewable methods to produce high yields and potent buds without breaking the bank or your back.

Biodynamic
This is another approach to farming that is worth mentioning because it is gaining popularity. In addition to using compost and natural fertilizers, biodynamic farmers use more esoteric methods. They consider the cycles of the moon to time plantings and harvests, prepare homeopathic style remedies for the Earth and work carefully to improve the soil.

There are some biodynamic principles that are useful for growing marijuana, especially the considerations for the soil. These have been incorporated into this article.


Growing outdoors vs. growing indoors

Growing cannabis outdoors vs growing indoors

Ideally you should grow marijuana outside. The natural soil provides nutrients, the sun provides light, the rain gives the water and the entire life cycle of marijuana plants progresses naturally. This is not always possible, due to stealth concerns, climate and light cycles. After all, what if you need a crop to mature in the middle of winter?

Indoors or out, there are some things you can do to make your next grow more sustainable.

Tips for growing marijuana naturally outdoors

The two biggest environmental concerns with outdoor marijuana growing are pollution and water consumption. Excess nutrients and pesticides contaminate run-off polluting water tables, rivers and eventually oceans. Growing strains that require large amounts of water in arid or drought-stricken climates is an irresponsible and unsustainable choice.
What can you do?

– Use Natural Nutrients and Pesticides
– Use Nutrients Sparingly to Reduce Run-Off
– Use Drip Irrigation

Or water by hand to ensure that the water goes directly where it is needed. Sprinklers are incredibly wasteful.

Use mulch
A layer of leaves, straw, shavings or even stones around the base of each plant will help prevent evaporation and keep water in the soil.

Plant closely together
This shades the soil, reduces evaporation and makes it easy to water just the plants you want to grow. Keep in mind that marijuana planted this way will need ample nutrients to stay healthy and produce high yields. Check out the section below on natural nutrients for ideas on enriching the soil

Water smart
Be sensible about how and when you water your garden. Water at night or in the evening to reduce evaporation. Once the plants are three to four weeks old, start watering deeply just twice a week. This will encourage the plants to develop strong, deep roots instead of staying at the surface.

Choose the right strain for your climate
If you live in a dry, arid climate grow a strain that evolved for that climate like Durban Poison, Power Plant or Afghan.

Tips for growing marijuana naturally indoors

Obviously an indoor grow is going to use more resources. For good yields you need grow lights, you may need a ventilation system and a hydroponic set-up as well.

There are a few things you can do to decrease the environmental and the financial costs of an indoor grow:

Use full spectrum LED grow lights
Full spectrum LED grow lights are the best choice for a more natural grow. You will enjoy higher yields with less waste because the available light matches the wavelengths of light that plants can actually use. This means less light is wasted. LEDs stay cool, requiring less ventilation and fewer fans to prevent burning. They use about 50% less electricity than equivalent HID grow lights.

Choose feminized strains
You should be thinking about efficiency with an indoor grow. By the time you let male plants mature to the age you can identify them you’ve wasted 3-6 weeks of light, power and nutrients on plants you’re just going to throw away.

Grow fast finishing strains
Pick strains that finish flowering in eight weeks, not twelve or fourteen. Faster finishing means fewer resources invested.

Train your plants
Use marijuana training techniques to take full advantage of the available light. Techniques like Sea of Green, Screen of Green or Low Stress Training all strive to help more light access the entire plant. These techniques boost yields while reducing the energy requirements of the entire system.

Natural nutrients for marijuana

Natural nutrients for cannabis

Cannabis needs nitrogen (N), potassium (K), phosphorus (P) and a number of trace nutrients to grow well. Whether you are growing in soil or using a hydroponic set-up, there are natural sources you can use to provide these essential nutrients.

Using natural nutrients in soil

Growing marijuana in soil is the easiest way to provide abundant natural nutrients. Healthy soil has all the nutrients necessary for a marijuana plant to grow a beautiful crop of buds. Unfortunately, soil gets depleted over time. If you are planting in an area that has been farmed previously or you hope to reuse potting soil from a previous container grow, you will need to add nutrients back in.

The best way to improve soil is by adding compost. Compost is broken down plant material that is high in organic material. In addition to providing a rich source of nutrients, the organic material holds both water and air, providing a healthy environment for the roots of your plants.

There are several ways to go about producing compost for your cannabis garden or containers.

Traditional composting
Traditional composting means making a large pile (at least 3’ X 3’ X 3’) of dry and fresh plant material. You want to use about 60-70% “brown” material such as straw, hay, dead leaves or dried stems and fan leaves from your last grow and 30-40% green material. The green stuff can be kitchen scraps, grass clippings or fresh plant waste.

Keep the pile evenly moist but not wet. It will heat up to about 110°F, killing any weed seeds and providing a good environment for healthy microbes that will decompose the material. You will need to turn the pile every six weeks. In three to six months you will have a heap of rich, black soil that can be spread atop your garden, tilled in or mixed into a container.

Compost tea
If you have mature compost, you can soak it in water for ten days to make a rich compost tea. This solution can be sprayed on plants once a month to boost growth. You can also make a compost tea out of fresh plant material by soaking it for about a month. This works best if the solution is aerated or at least thoroughly stirred each day.

Vermiculture
If you don’t have the space for a large outdoor compost pile, consider making a worm bin in your kitchen. All you need is a plastic tub with a lid, newspaper, kitchen scraps and red wriggling worms.

The worms will digest everything from kitchen scraps to plant waste, quickly turning it into rich worm castings full of nutrients. This works much faster than traditional composting, but on a small scale. A worm bin is also a convenient and stealthy way to dispose of trimmings from your marijuana grow.

Composting in place
If you are growing outdoors you can also compost in place to return nutrients slowly to the soil. This means simply leaving kitchen scraps or plant waste around the base of the plants and allowing them to break down over time. Keep in mind that this can attract unwanted rodents or pests to your garden. It is usually best to compost kitchen waste separately.

Using plants to add nutrients to soil
If you are growing outdoors in soil you can use other plants to enrich the soil. Here are a few common plants you can grow throughout your marijuana garden that will keep the soil full of nutrients.

– Chamomile
This popular tea herb brings up minerals from deep in the soil. It can be grown throughout the garden and easily reseeds itself.

– Borage
Like chamomile, borage pulls trace nutrients from deep in the soil and makes them available at the surface. Borage also grows quickly, providing lots of green leaves that can be added to the compost pile or cut and dropped to compost in place as a good mulch.

– Clover
Clover does double duty in your garden. Not only does it pull nutrients from deep in the soil to the surface where they are available to marijuana plants, it also forms a thick living mulch. This living sheet protects the soil from erosion and holds moisture by preventing evaporation.

Try planting clover around your cannabis plants in containers. They provide the same living mulch benefits, reducing the amount of water you use and stabilizing the soil.

You can also plant a cover crop before each new grow to replenish nutrients that have been used by your cannabis plants. Good cover crops to replenish the soil include nitrogen fixing legumes like alfalfa, beans or fast growing green manure plants like mustard or buckwheat that can be tilled in to boost the organic material content of the soil.

Using natural nutrients in a hydroponics system

You can use natural nutrients when growing marijuana in a hydroponic system. However there are some special considerations to using natural nutrients in a hydro set-up.

There are two types of hydroponic nutrients: synthetic and organic based. Synthetic nutrients are specially formulated to be available for uptake by plant roots. Organic fertilizer components depend upon natural microbes to break them down.

The end result of either process is the same: ions that the plant can absorb and use for growth. But the processes involved in making synthetic nutrients are often harmful to the environment. And those of the biodynamic gardening perspective would say that they also bear a less healthy energetic signature as well.

Problems with organic based nutrients in a hydroponic system
Synthetic nutrients do not interact with organisms in the water, so you can pour them directly into the tank and allow it to run without changing the water for two weeks or longer.Organic nutrients do interact with organisms in the water and break down, becoming a stinky mess in your grow room. They can also clog drippers and small pipes throughout the system.It’s not just organic nutrients that have a downside. Potent synthetic nutrients easily burn plants and are not forgiving of errors.

How to use organic nutrients successfully in a hydroponic system
There is a simple trick that will allow you to use organic nutrients in a hydroponic system without any problems: create a dual level hydroponic system.

This means building a set-up that allows you to add nutrients directly to the primary growing medium, which remains separated from the pure water reservoir below.The set-up actually mimics nature, as the cannabis plants roots typically absorb nutrients only in the top 1/3 of each root. The bottom of the root is for water absorption only. Some growers also incorporate natural nutrients like worm castings (from your vermiculture bin!) into a drip irrigation system.

Natural nutrient recipes for growing healthy marijuana
You can purchase organic nutrients for a hydroponic or soil grow, or you can make your own compost. These methods supply nutrients to the roots of each plant.
The leaves are also a great surface for nutrient absorption. Here are a few recipes for nutrient rich sprays that you can apply directly to the leaves of your cannabis plants.

– Calcium Phosphate Spray (Use a Calcium/Phosphate spray when you switch from vegging to flowering)
During this stage your plants need extra help. Calcium strengthens the stems so they can support heavy buds, while phosphorus enables the roots to absorb more water and nutrients. This simple recipe from the Unconventional Farmer makes a spray that you can apply directly to the leaves of your plants when you switch the lights over. Keep in mind that this spray needs to be made at least three weeks before you plan to start flowering. Here’s how it’s made:

Gather enough egg shells to make 1 cup when crushed. Thoroughly rinse egg shells. Cook shells in a dry skillet until some shells are black (calcium) and some are white (phosphorus). Place in a jar with 5 cups of vinegar and watch it bubble. When the bubbling stops, seal the jar, let sit for 20 days and strain.

When you are ready to use the spray, mix one tablespoon of the vinegar/egg shell mixture with one gallon of water.

– Simple, Fast Nitrogen Spray
This is the fastest, easiest recipe that you can use when your plants need a nitrogen boost. Some people think it is a little on the gross side, but I say take advantage of the resources at hand to grow the best buds ever. All you do is mix one part urine (yes, human urine) with 10 parts of water in a spray bottle and apply directly to leaves.

Remember, urine is sterile and very high in nitrogen. Many home gardeners use this recipe when they don’t have time to brew a compost tea. It is just as effective, much faster and a lot less work.

– Bokashi Fermented Stems
A Bokashi culture is a quick way to produce nutrient rich compost tea using fresh stems and leaves (or any other plant material). Simply add the culture to a bucket of plant material and cover with water. In just a week you’ll have a bucket of nutrient rich fertilizer that you spray on the leaves or add directly to the soil.

Some hydroponic growers use this or similar nutrient teas in their soil-less systems. Keep in mind that a reservoir containing any organic nutrient solution should be changed frequently to prevent decomposition and unpleasant odors.

Beating mold and pests without chemicals

Beating cannabis mold and pests without chemicals

Nutrients are not the only source of chemicals applied to marijuana plants. Both soil and hydroponic growers alike face the ravages of pests and mold. Here are some tricks and techniques for dealing with common marijuana diseases and pests naturally.

Companion Plant to Repel Pests
You can use other plants to fight pests for you. These easy to grow, common garden plants are perfect for combating the bugs that plague marijuana:

Cilantro
Repels aphids, spider mites and potato beetles

Chrysanthemum
A popular flower, chrystanthemums contain pyrethrin, a natural insecticide that kills damaging insects and harmful root eating nematores.

Dill
Repels spider mites.

Foxglove
Foxglove and mullein both attract the insect dicyphus which eats whiteflies, aphids and spider mites.

Garlic
A delicious aromatic vegetable, garlic is the most famous anti-pest companion plant. It accumulates Sulphur, a natural fungicide and repels aphids, root maggots and snails.

Marigold
Mexican marigolds are best, though any variety will do. They release a stinky chemical into the soil that makes all the surrounding plants taste like marigold, a flavor repugnant to most damaging insects.

Peppermint
Repels aphids. Menthol, which is in all mint plants, repels harmful insects while attracting beneficial pollinators.

Sunflower
Attracts beneficial mites and pirate bugs to eat spider mites, fungus gnats and scales.

Yarrow
Attracts predatory wasps and ladybugs to eat harmful insects.

Natural pesticide sprays

You can mix your own natural sprays to repel most of the common pests that threaten your cannabis plants. Here are a few of the most effective recipes:

 Chili Spray for Spider Mites
Just put some hot chilies of any variety in the blender with water. Be sure to strain the mixture or it will clog your spray nozzle. Coat the entire plant, the grow medium and the surrounding area with the chili spray. Wear gloves and glasses to protect yourself from the spicy fumes.

You’ll have to repeat the process at least once as the eggs already laid by the mites hatch out.

Garlic Tea
If you don’t want to grow garlic around your plants, you can still enjoy its pungent pest repelling properties by making this garlic spray. Just boil roughly chopped garlic in water and steep till cool. Strain and apply to plant leaves.

Tomato Leaf Spray
Crush tomato leaves, soak in water for several days, strain and spray. This works best against grasshoppers and white flies. You can also experiment with your own pesticide spray. Common and useful ingredients include:

– Chilies
– Mineral Oil
– Garlic
– Onions
– Dish Soap (use very sparingly)
– Neem Oil
– Chrysanthemums
– Tomato Leaves
– Tobacco

Growing Marijuana Naturally is About More than Health or the Environment. Growing marijuana naturally requires a shift in your mind-set. You have to let go of many of your preconceived notions about cannabis cultivation. Start by incorporating just one of the ideas in this article into your next grow. See what happens.

Any step towards natural growing and sustainability will benefit not only you but the entire planet. Perhaps more importantly, it will make marijuana growing more readily accepted by the government and the community in general.

Right now cannabis is grown wastefully, squandering resources and generally pissing off the neighbors and communities near growers. Not only do we want cannabis to become widely legalized, we want it to be approved of so we don’t have to constantly battle for the right to grow. Be smart, grow natural and watch the world open up to the idea of widespread marijuana agricultural.

Thanks for reading. Please leave questions and comments below.

The post The Complete Guide To Growing Marijuana Naturally appeared first on TheJointBlog.


Tips and Tricks to Prevent Cannabis Odor

$
0
0

By Robert Bergman, ILoveGrowingMarijuana.com

smellMarijuana has an undeniably, strong, unique smell that anyone can recognize. How many times have you been out and suddenly you were hit with it? I am pretty sure you were 100% aware of what it was you were smelling.

This odor is appealing to some, however, it can completely blow up your spot in the wrong way if the wrong people catch a hint of it coming from your grow room.

With each passing day,  marijuana is becoming more and more popular worldwide as people begin discovering its medical benefits or enjoy it for a real high. We now have more people growing marijuana indoors than ever before so there is a pressing need to help growers learn to cover up the odor these plants give off. The smell while growing marijuana is what makes the practice so risky since the last thing you need is this to get the attention of people living in your area.

A grow room is bound to kick up a serious amount of potent marijuana odor, so attempting to grow without knowing how to properly deal with heavy odors could cause you to end up being a target for robbery or worse getting in trouble with the law. However, masking the smell can be a challenge. Your approach varies based on the size of your grow space. With a small grow space that has only 1 or 2 plants, it is possible to mask the smell much easier. This is definitely not the case with big grow areas because you literally need to scrub the air.

Odor is a big deal. So, if you are planning to grow indoors, this article will be informative and teach you how to neutralize odors the best way.

Great ways to prevent marijuana odors

Great ways to prevent cannabis odors

Now that we are clear about the fact that marijuana odor is the main reason for growers getting caught, we need to explore the means to prevent this from happening. You should be able to enjoy a good high without your neighbors putting the obvious pieces together that will lead to you getting exposed. We all know that people love to run their mouth about who is doing what so let’s give them less to talk about, especially when it something as sensitive as growing marijuana.

So, not only do you want to ensure your grow space isn’t giving you away by emitting a potent smell, you also want to be sure you are not talking about it.

Here are the causes of potent marijuana smells and how you solve this problem:

  1. Your vent fan is lacking a vacuum

Fans are necessary for your grow space because they can be used to remove the air from the environment. Take the time to properly position the fan so that it functions as a vacuum in your grow space. Basically, this is the way you will know that all the air is only leaving through a filter.

One way you can know that you created an adequate vacuum is by placing a thread in the opening of the grow space and keeping the door open just a little bit. When you notice the thread being sucked back into the room, then you now have a good vacuum. With any other results, you know not that the cannabis smell is going to escape your grow room through cracks and holes in the space.

Download my free marijuana grow guide at this link for more growing tips

It is e ssential that your space has the right amount of ventilation at all times.

For a more detailed breakdown, you will want to divide the number of lamps by the number of watts by 2 which will equal the air outlet. For example: for 5 x 600 watt you need 1500m2 outlet and 750m2 inlet. When you multiply 5 x 600, you get 3000 then divide it y 2 which equals 1500m2 air inlet. Combine the vent fans to one controller to make sure you don’t end up activating just the air inlet. When you only activate the air inlet, it will result in too much pressure based on the conditions in the various parts of your marijuana grow space.

  1. Not having the right filter
  2. You don’t want a vent fan that is too small because your crop could easily be discovered by nosy neighbors. For example, a vent fan that measures 1500m3 will need a filter that is adjusted for 1500m3. For the absolute best results, change your filter to be 20% more volume than the vent fan. Filters have active carbon that will neutralize negatively charged odor ions.

Filters that are too small result in the vent fan forcing air through too fast so that the air doesn’t filter properly. Filters should never be used more than a year because it will get to a point that it no longer works right.
While you have to ability to switch out the carbon filters on your own, this can get tricky since it requires professional equipment such as a vibrating plate to spread the carbon in equal proportions. Don’t take the chance – just get yourself a brand new filter.

  1. Exhaust leaks

It is easy for a single leak to go unnoticed. Something like this could seem small, but it could be the reason for a very potent marijuana smell being released.

If you have one of those filters that are connected to a vent fan with a hose, then you’d want to make sure it is properly fixed with clamps. Always check the hose to make sure there are no holes. Insulated tubes require particular attention due to the inner aluminum tube having small holes in it. Attach the inner tube to the flange first since it connects much easier. Then you can connect the outer part of the hose with a clamp and secure it to the box.

Systems that help mask the smell of indoor marijuana growing spaces

Systems that help mask the smell of indoor cannabis growing spaces

There are systems that effectively mask the smell of marijuana and even eradicate it altogether. T hey are available with different features and at different prices.

The most popular ways to remove cannabis odors are:

  1. Odor neutralizers
  2. Air purifiers
  3. Carbon scrubbers

Odor neutralizers

These are used to cover up marijuana odors. Because odor neutralizers are so potent, they can actually affect the taste of buds after some time.  We never suggest putting these in your grow room while the plants are flowering. But, you can use odor neutralizers that have a very potent aroma to stop smells from spreading outside the space. However, if you are interested in scrubbing the odor from the air, this is not the way to get that done.

Good luck if you plan on using wall plug-ins and sprays to deal with cannabis odors because the odds that they will mask the smell for long periods of time is very slim. Even more, these products have an adverse side effect as they could potentially mess up the natural smell of marijuana plants.

You will need an odor neutralizer that is capable of being consistent throughout your plant’s various growth cycles since the plant never stops emitting its smell while growing. Here are some solutions to this problem for those cultivating in a small grow room.

Ona products

Ona gels to prevent cannabis ordor
Ona products are a great solution that  have been on the market since 1995. They work well hydro grow systems.  Ona is available as a gel, block, and mist product. Initially, both Ona Gel and Blocks were created with the intent to manage the foul odor inside of sewage facilities. Once people began to realize just how well these products reduce neutralize strong odors in general, they became more readily available.

  • Ona gels

Ona gel is available as small gel cubes that reduce unpleasant odors and replace it with a more preferred scent. These little cubes will successfully do their job until they are completely dried out. It is common to put them in the air vents which is a great way to make sure air is always filled with an enjoyable scent. There are multiple scents to choose from.

Ona blocks

These are not all the different from Ona gels except they are actually 170-gram tablets that you leave out in the grow room.

  • Ona mist

Ona mist is a spray that reduces smells very quickly and can be used for this purpose in your car and living space. As an extra bonus, this product is 100% organic and can be trusted to use around children, food and pets.

  • More about Ona products

While these products are great at neutralizing odors fast, work well in small grow rooms and are simple to use, they do not last long. You will have to purchase new ones just about every 3 to 4 weeks. Various testing has proven that Ona Gel is best for masking marijuana odors so long as you do not have many plants you are growing in the space. With just 1 or 2 tablets situated outside of the grow space you can effectively cover up the scent.

Even though these products are great, we warn you not to put these inside near plants that are flowering.  Ona products could mess up the smell of your marijuana buds if place in the same space as the growing plant, hence the warning. Putting this product in your living room, for instance, is good enough to mask the smell from anyone who comes over. Again, remember that Ona products are only to be used outside of your grow room.

The Neutralizer

The Neutralizer to prevent cannabis odor
Another great product that comes highly recommended is The Neutralizer which has actually won awards in Europe for its effectiveness. It consists of essential oils that neutralize smells and replaces them with an enjoyable scent. It actually functions similar to regular plug-ins you buy at the store. The steps are simple and only require you to put the cartridge in place and plug it in.

Again, this is another product that is good for small grow rooms and can last as long as 5 to 6 weeks.

For very small spaces, you can purchase the condensed form which also lasts the same amount of time. And with both of them, you can get interchangeable cartridges.

Vaportronic

Vaportronic to prevent cannabis odor
Vaportronic products come in discs of either 6 or 12 grams that consist of Neutrox Gama. The cool thing is you can program these discs to operate at different times with up to 5 discs at a time. These are called EZ disks which require a D battery for you to use it.

These discs can last you almost two months and are perfect for small grow rooms as well. The scent they give off is a lovely pine or eucalyptus smell.

Air purifiers

Air purifiers to help with cannabis odor

Who doesn’t like to have fresh, clean air to breathe in their environment? A ir purifiers are easy to find, and many claim to remove unwanted smells via a filter.

While air purifiers may be great to rid your home and overall environment of unpleasant odors, there are questions about how effective they are for eliminating potent marijuana smells in your grow space. Well, as you may have guessed, the answer is not very effective.

There are good air purifiers on the market that will get rid of certain odors in the air, but this just won’t cut it for indoor marijuana growing. While it may remove some of the odors, you will end up needing something stronger to get the job done right. Now, some air purifiers do help remove bad odors from the air. However, they are only marginally effective. They simply are not potent enough to pull every smell from a grow room. Therefore,  we do not recommend only using an air purifier to get rid of odors in your grow room.

You are better off sticking to air purifiers for less potent scents and going with the big boys for that cannabis scent.

Carbon filters

Carbon filters to prevent cannabis odor

Of all the products available to eradicate odors, carbon filters, also known as ‘carbon scrubbers,’ are by far one of the more desirable options for eliminating harsh odors when doing indoor marijuana growing. These are highly effective even when growing strains that are known to let off the strongest odor. Carbon filters literally scrub the odor from the air and neutralize all smells that come through.

When you want to neutralize the air leaving from your exhaust carbon filters are the way to go. Carbon filters are excellent for making sure there are no chances of a marijuana scent exiting the window or some other exit point and into your neighborhood. These are a sure way to keep your marijuana growing private and prevent you from getting into any trouble.

When using carbon filters, you are going to need a tubular air extractor that has the right efficiency for your particular grow room. When the air is removed from the grow space it goes through the filter that is full of little small active carbon bullets, then leaves out without any smell. Carbon filters are different from the other systems because it does give off a fragrance and will only remove all odors from the space. These can be purchased in various sizes so you can select one that is perfect for your particular space.

Carbon filters are very reliable, simple to maintain after you get it set up, and they will last you a long time!

They use activated carbon to consume the odor from the air that is forced through the filter. You have to actually create a way for the nasty cannabis odor to be pushed into the filter by using a fan which will do this for you. To accomplish this goal, we suggest you get a carbon filter as part of your exhaust system that will contain an exhaust fan which will force the air out of your space. When the warm air is forced from the area where your plants are, the carbon filter will scrub all smells from the air at the same time.

Installing your carbon filter
The first thing you need to consider is how big your exhaust is. You will find that several air-cooled cannabis grow lights have a 6-inch exhaust hole. If you are growingin a small space, then you will need to get all your stuff in 6”.

The reason you want to get a 6” fan is because they have the ability to clear the air from just about any small grow space. Do not settle for a 4-inch fan because you will be sorely disappointed since they are not strong enough for a 6-inch carbon filter and to make it worse they won’t fit the regular air-cooled grow lights.

You only want to purchase 8-inch filters for commercial facilities that need very strong fans, and you will never be able to connect this to your standard grow lights.

Next, you should make sure the CFM rating matches the fan and carbon filter. The carbon filter’s CFM rating should be exactly like or even higher than the one you see listed on the fan. By doing this, you will have the best results and the carbon filter will only absorb the amount of air it can to scrub the odor out.

After you have considered these two things, install the fan and filter into your exhaust system. Pay very close attention to the provided instructions when installing your filter and fan. You can find many examples that will clearly show you how to properly set up your carbon filter in your exhaust system. When you have your carbon filter situated towards the back of the exhaust system, it will reduce the possibility of marijuana odors leaving the space during the flowering phase – when it is likely to be letting off the most potent scents.

Stay away from ozone generators

Stay away from ozone generators to prevent cannabis odor

When talking about preventing marijuana odors, we must mention ozone generators because many are trying this method, but we have some warnings for you.

These are actually quite new in terms of systems used to neutralize odors in marijuana grow rooms. Ozone generators are said to eliminate smells, freshen up the air and destroy mold. Yes, you will find many marijuana growers giving praise to ozone generators for getting rid of odors, but we just disagree with using these for marijuana growing.

So, I know you are wondering why we advise against using ozone generators. Ozone generators are terrible for the atmosphere to the point that they are actually illegal in certain states. Now this should say something! Not only are ozone generators illegal in some places, but they are also not good for you!

Below you will find some links that will lead you to more information about ozone generators and why they aren’t good for you. Some organizations that have suggested against them include:

Some growers swear you can safely use ozone in your grow room by venting it from the space ensuring that it only gets into the exhaust. We say why take the risk of using ozone when a carbon filter works just as good without the possibility of causing health problems.  You and your family are safer and better off without it.

The post Tips and Tricks to Prevent Cannabis Odor appeared first on TheJointBlog.

Getting The Correct Dosage For Marijuana Edibles

$
0
0

By Robert Bergman, ILoveGrowingMarijuana.comedible

If you have ever eaten or baked marijuana edibles before, you are likely well aware of the difficulty that comes with figuring out your proper dose. Time and time again people either have too little marijuana (leading to no high at all) or far too much (resulting in an uncomfortable high), and they can’t seem to get it right even after some major trial and error. Luckily, this article will give you some of the most important tips for getting the right dose in your next batch of marijuana edibles.

Benefits of marijuana edibles

Benefits of cannabis edibles

Marijuana edibles can be a great thing to do, especially if you are someone who prefers not to smoke. They are perfect for people who need to consume marijuana for medicinal properties and don’t want to inhale smoke into their lungs (thus leading to more or furthering existing health problems).

Marijuana edibles are also more secure for public consumption than smoking pot is. It is going to be rather obvious when you are smoking marijuana outside or in a public area, but eating a cookie or a brownie is an entirely normal and inconspicuous activity for you to be doing. It is unlikely a police officer is going to stop you and ask about your “stash” of cookies. This also works well for medicinal users, as they often need to take marijuana during the middle of the day. Edibles provide a tool for doing that.

Of course, eating marijuana edibles is a completely different science than smoking pot. If you don’t already have much experience with it, it can lead to some disappointing or unpleasant experiences if improperly done. Read on for tips on how to dose safely and correctly.

The feeling takes time

Cannabis edibles in the body

If you are someone who is used to smoking marijuana, then this is an important tip for you. Smoking or vaporizing causes you to feel high practically instantly, and you can, therefore, make informed decisions about when to stop and how much to keep going. This is not so with marijuana edibles. When you eat a marijuana edible, you are not going to feel the effects right away. You don’t have the signals to protect you from having more than you prefer, so the risk of consuming much more than you meant to is higher.

This is simply because your body needs to go through the entire digestion and metabolization process before the THC enters your bloodstream. The liver will take part in processing the food before your brain feels anything. This can vary from person to person, as everyone has different metabolism speed. While your friend might not feel the effects for two or three hours, you might already be high as a kite after just one hour.

Start off slow
Because the effects take so long to hit when eating marijuana edibles, it is always important to remember to go slow. There is always time for eating more, but it is not possible to un-eat what you have already consumed. Regret runs rampant with people who refuse to go slow for their first time eating marijuana edibles — don’t be one of them.

Start off with just one brownie, or perhaps one-half of a brownie, and then simply observe how it is affecting you. Most likely, you will be eating marijuana edibles that you did not purchase or make yourself so you won’t know the exact specifications of how many milligrams of marijuana there are per brownie. For that reason, have a little bit and then wait for at least an hour.

Whether you are trying to get high for fun or are eating marijuana for its medicinal benefits, the same tactic applies. Even consuming medicinal marijuana can lead to an unpleasantly strong high if you don’t do it correctly and slowly. Often the person who made the brownies can tell you exactly what they added, so if that is an option, then you should try asking them for more information before taking your first bite.

Marijuana edibles are stronger than smoking

Cannabis edibles are stronger than smoking

It’s important to remember that, with the process of making marijuana edibles, marijuana is turned into an incredibly concentrated form. This form is in cooking oil, marijuana butter, or other types, but in any case, it will be a higher concentration than something you would smoke. Because of this, ingesting more marijuana than you want is very easy to do. This further complicates the task of dosing your edibles correctly.

It helps some people to think about marijuana as if it were alcohol. About 10mg is one dose, just like one beer is one “drink.” The amount affects everyone differently, but generally, you can have a good idea of how many “drinks” you should have within a certain amount of time. When in doubt, take it slow and take your time until you can confidently dose it correctly.

One good aspect of marijuana is that you can’t die from an “overdose.” That being said, it is extremely unpleasant to have too much marijuana all at once. Sometimes one brownie or one cookie is actually packing two or three doses of marijuana, so even starting off by eating just a partial one can be a good idea.

Just like with drinking alcohol, your body’s response to eating a marijuana edible is going to vary according to how much you have recently eaten. If you just had a meal, the effects of the marijuana edible will not have such a strong impact on you. If your stomach is empty, however, you will be hit much harder. It is better to go for the former route: try eating a meal and then trying an edible, not having an edible and then eating a meal. This is because, unlike with alcohol, eating after consuming a marijuana edible can actually strengthen the effects rather than easing them.

Read the label

Cannabis edibles label

If you have purchased a marijuana edible, it should have packaging and an informative label on it. However, because marijuana remains illegal in most of the world, there is a certain lack of standardization and consistency as well as auditing of these products and how they affect people. This makes correct dosing even harder for the consumer.

Download my free marijuana grow guide at this link and learn to grow marijuana for your own edibles

Therefore, always read the label carefully to figure out how much marijuana is contained in that brownie or cookie, and then determine how much of it you should actually eat. Of course, not all labels are going to have this clearly indicated, given the fact that the marijuana industry is still so young. For that reason, you should opt for purchasing edibles that have clear labels and good packaging — this indicates a certain amount of commitment of the company to strive for quality and consistency, and that means it is probably a better product anyway.

Ignore your friends and listen to your body

listen to your body when eating cannabis edibles

We don’t mean that you should not speak to your friends or hang out with them. Rather, don’t give in to peer pressure when it comes to eating marijuana edibles. If you have a friend who is bragging about being able to eat four pot brownies, don’t take that as an invitation to compete.

Instead, stick with what you know about your own body and what makes the consumption of marijuana fun for you. While your friend is likely going to end up unpleasantly high and miserable, you will get to enjoy the perfect level of high that makes you love marijuana so much to begin with. Ultimately, isn’t this better than trying to compete with someone else?

What you shouldn’t ignore is what your body is telling you. If something doesn’t feel good, remember what and how much you ate for next time — even writing it down in your phone can be a good idea — so that you don’t make the same mistake twice. Keep in mind that differences in your experience versus your friends’ experience can even depend on the strain. Different strains affect people differently, so all you have to know is what is right for you.

Keep in mind that even certain aspects such as gender, age, and weight can make a difference in how your body is affected by marijuana edibles, and how fast you start feeling the effects. Gender aside, these body differences will even change over the course of your life, so you won’t always have the same effect from eating a marijuana edible.

Milligrams are important

Milligrams are important in cannabis edibles

As stated above, about 10 milligrams is roughly one “dose” of marijuana, much like one “drink” of alcohol. Once you know exactly how many milligrams affect your body, you will be better able to make informed decisions. Keep track of how many milligrams you have consumed so that you don’t have too many all at once. If there is a delicious dessert such as a chocolate bar that has 100 milligrams of marijuana in it, you should break it up into ten pieces and dose it that way. Use this logic for all aspects of eating marijuana edibles.

Remember, even taking your first dose of 10 milligrams can be too much for some people – especially if you haven’t eaten recently and therefore have an empty stomach. Sometimes if you have a smaller body mass, or if you are simply completely new to the marijuana edibles scene that can do it as well.

A good option for beginners, or those who simply don’t know how much one dose of 10 milligrams will affect them, is to choose a brand or product that comes in 5-milligram doses. Often, they are specifically created for newcomers as well as people who just happen to have a low tolerance.

Remember, you can always start with 5 milligrams and work your way up from there, but you can never take back the extra milligrams that you shouldn’t have eaten in the first place.

The type of edible can make a difference

The type of cannabis edible can make a difference

If you are eating a chocolate bar infused with marijuana, you might have an entirely different experience than if you were eating a gummy treat infused with marijuana. Reactions to the various types of marijuana edibles will also vary from person to person. For that reason, milligrams aren’t the only thing you need to pay attention to — you should also remember what kind of marijuana edibles you have consumed in the past, and how that affected you.

Download my free marijuana grow guide at this link and learn to grow marijuana for your own edibles

Many people will discover one kind of edible that becomes their brand or product of choice. If you know that a chocolate bar with 10 milligrams of marijuana in it is perfect for you, then why not keep going with that all the time? This way you can rest assured in the knowledge that you truly know what you’re doing and how it will affect you.

Your smoking tolerance is not your edible tolerance

Your smoking tolerance is not your marijuana edible tolerance

If you are someone who has been smoking marijuana consistently for years, then you might consider yourself a “seasoned” veteran in the marijuana world and will be unafraid in the face of trying marijuana edibles for the first time. Your high tolerance of smoking marijuana will not translate into a high tolerance for eating marijuana, however. It is a vital lesson to learn.

No matter who you are, if it is your first time having marijuana, start out small and slow. Remember that your tolerance for smoking marijuana comes from your lungs, and edibles won’t even touch your lungs because they depend completely on your stomach. The stomach lining does not have the high number of membranes that the lungs do, meaning the high (when it hits you) will be far more intense than a high from smoking marijuana.

If you are planning on going anywhere after you eat a marijuana edible for the first time, plan on getting a ride from someone or taking a taxi, because it would not be safe.

Try your first edible in a safe, comfortable environment

Try your first cannabis edible in a safe comfortable environment

When you are trying out a marijuana edible for the first time, being alone is likely not a good choice. Keep a close friend or family member with you, in case of an “overdose”. That way they can help you through it more comfortably. They can also help you remember exactly how many gummy bears, cookies, or chocolate bars you had eaten and how it affected you so you will have more accurate information for the next time around.

The location of your first edible is also important for you to have a positive experience. If you are trying a larger dose, being home is probably your best bet as it will allow you to simply go to bed when you need to. Besides, even if you use the perfect dose, what is more perfect than enjoying the happy and relaxed feelings of marijuana with your friends and family in a beloved, safe, and comfortable setting?

The more knowledgeable and comfortable you become with eating marijuana edibles, the more you will enjoy it. Once you have reached a point of feeling like you know what you are doing, consuming edibles in a more social environment or among strangers can be a safer thing to do. You certainly won’t want to be eating with strangers for your first time in case you have too much.

Help, I’ve eaten too much!

What to do when you eat too much cannabis edibles

This is a typical cry for help from a newbie marijuana eater. This has happened to us all at some point, so try not to panic. Luckily, no one has ever died from a marijuana overdose, and neither will you. All you can do at this point is to keep breathing normally and stay relaxed as much as possible. Take note of precisely how much you ate and what you ate this time around so that you can avoid feeling this miserable next time. In the end, this could be a valuable lesson for you.

It’s all worth it in the end
Ultimately, the struggle to find the perfect dose for you is worth it when looking at marijuana edibles. They can offer a wide variety of benefits and enjoyment without some of the negative aspects of other forms of marijuana. Some people simply don’t like the smoking experience, while other people can’t smoke and need marijuana for medicinal purposes. In either of these cases or any of the other many examples out there, marijuana edibles make for the perfect compromise. As long as they are eaten safely and smartly, you can end up having developed an entirely better lifestyle simply through the safe consumption and use of marijuana edibles.

So what are you waiting for? Go out there, buy some marijuana edibles or find a recipe to make your own. You can see what all the hype is about –, and we’re sure you will be just as hooked as everyone else.

Thanks for reading. Please leave comments or questions below and don’t forget to download my free grow bible. For any grow related question please visit the marijuana support page.

The post Getting The Correct Dosage For Marijuana Edibles appeared first on TheJointBlog.

Autoflowering Marijuana Basics

$
0
0

budBy Robert Bergman, ILoveGrowingMarijuana.com

Autoflower is a newer development in the cannabis market, and it has really exploded the last few years – even Google knows it. Searches for autoflowering marijuana has doubled over the last single year. People are getting increasingly excited, interested, and curious about it. There is a good reason for all this excitement. This isn’t a typical marijuana trend; it could be a total game-changer. So, why all this clamor about autoflower marijuana plants? There is a good reason for all this excitement, let’s look at some of the best attributes of the plant:

– They are smaller. This means they are easier to hide, harder to spot, and are, therefore, a safer choice with a greater variety of grow location options.
– They grow very quickly, have high yields in comparison to their size, and are even more resistant to pests and insects than other marijuana strains.
– No matter what the lighting situation is like in your outdoor or indoor grow setup, they follow the growth schedule embedded in their genes. They will flower after a certain amount of time, not after the light begins to change. This opens up a lot of new possibilities for many growers.

This article is intended to to keep you informed about this development in the marijuana world.

What is autoflowering marijuana, and how was it created?

What is autoflowering marijuana, and how was it created

There are plenty of different strains of autoflowering marijuana, and no two strains are exactly the same. Some people think of autoflower marijuana plants as lower quality than more conventional and traditional types of marijuana. Others consider it a godsend that makes life significantly easier for marijuana growers. Whichever category you fall into, it may be important to learn more about it, and the different options out there.

So what is an autoflower marijuana plant? To fully understand this, it’s best first to know a bit more about marijuana itself. Marijuana is a photoperiod plant, which means that its life cycle (specifically the flowering phase) is influenced by changes in the timing of exposure to sunlight.

Through this logic, growers can manipulate the growth of their indoor plants with ease. Young cuttings can be spurred to enter the flowering phase simply by giving them 12 hours of uninterrupted darkness every night for a couple weeks. Older plants growing outdoors won’t enter the flowering phase until this same light change affects them through the natural seasonal variations. These don’t occur until after the middle of summer.

Autoflower strains of marijuana flower when the plants are a particular age, rather than flowering in response to changes in light exposure. This means that, regardless of the weather and sunlight patterns, they will enter the flowering phase after a certain number of weeks. This, understandably, has opened the door for all sorts of new possibilities in the marijuana growing world.

The addition of autoflower marijuana strains comes from the crossbreeding of ruderalis plants, with a “standard” marijuana plant. Because ruderalis plants were not cultivated for their high THC content (given the fact that the THC levels were very low), they were not grown or used by smokers very often at all. For this reason, the dominant traits of the first autoflower strain had to include high THC levels from the “standard” marijuana strain half, and the autoflower genetics from the ruderalis half.

The process was difficult, and largely unsuccessful at first. For this reason, not too long ago, growers did not readily trust autoflower strains, because of their low yields and low THC levels. They ended up being considered a scam, of sorts.

Things have changed, however. The autoflower strains on the market today are just as reliable as any other strain – just be sure to purchase them from a reputable source. The THC content will also be as high as it is described in the online information provided about the strain. With these traits stabilized, and the number of high-quality strains of autoflowering marijuana increasing all the time, the dawn of the age of autoflower has finally come.

What can you expect from autoflower strains?

What can you expect from autoflower marijuana strains

Autoflower strains of marijuana generally have a shorter life than other types of marijuana plants. Their quick turnaround is part of their appeal for growers who want more than one harvest per season. An autoflower strain usually takes between 7 and 9 weeks before they are ready to harvest.

When considering an autoflowerharvest, it is important to remember that it will be different from the harvest of other types of marijuana. Certain limitations that come with the plant’s not having the time to grow as long and that includes the fact that it will be smaller. Consequently, the harvest will be, too. Your yield can only be so high when you grow smaller plants.

Some of the highest quality autoflower marijuana strains require eleven to twelve weeks for full growth and flowering, to achieve the best possible harvest. It mostly depends on the strain you grow. Be sure to read the information provided for that specific strain, as well as any comments and tips from people who have successfully grown the strain before.

Starting off strong
When you grow any kind of marijuana plant, it is crucial to start the growing season, and entire life cycle, rooted in strength. With the short life span of autoflower marijuana plants, this is especially important.  The very beginning is the time to support your plants so they have as much growth as possible. If this is not done, you may end up with a harvest that is infinitely more disappointing than the “normal” marijuana harvest failure. The room for error is smaller with autos.

For this reason, it is often recommended that people who want to grow autoflower marijuana plants start growing them indoors, with artificial lights they can control. Indoor growing decreases the chance for error and favorably controls each aspect of your plant’s early life. A strong start ensures that it will get everything it needs to thrive, both now, and later on.

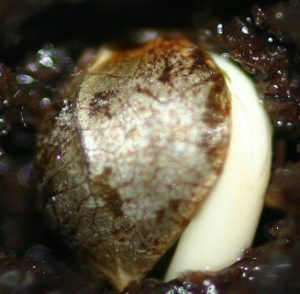
Properly germinating your marijuana plants is crucial to their healthy development, as well. This can be done naturally in soil, or in a container without any growing medium. Most autoflower marijuana growers actually prefer the second method. It simply involves placing a seed within a damp paper towel, or length of toilet paper, and putting it in a container of some sort that will retain moisture and humidity. This should cause the seeds to sprout within days. After they sprout, they should then be transplanted to their final growing medium. After this, do not transplant them again if you can help it as autoflower plants are small and are vulnerable to greater transplanting shock.

Cuttings
For now, cuttings are not a great idea with autoflower marijuana plants. The problem is that, while you can easily take a cutting successfully, you have to remember that the plants will autoflower after a certain age. The cutting’s age will merge with the parent plant’s age. This means they will flower at the same time. So if you are growing a cutting of an autoflower plant, the final plant will be much smaller than the parent, when it enters the flowering stage. When all this is considered, cuttings aren’t exactly worth it, as these particular plants are already small to begin with.

Feeding your autoflower marijuana plants
Once your autoflower marijuana plants have reached two weeks of life, you can feed them a small amount of vegetative feed. Feed them higher quantities of it gradually over time, until your plants are either six or seven weeks old. Don’t switch over to feeding them flowering food until you have visibly noticed a stop in its vertical growing. Even if the flowering phase started a week earlier, don’t be premature with the flowering food. Be guided, instead, by the ending of vertical growth.

Lighting for autoflower marijuana plants
Similar to regular marijuana plants, you can decide one of two lighting options:

  1. One choice is to expose your plants to 24 hours of light per day
  2. The other is to allow them some rest every day, and give them 21 hours of light, and three hours of darkness. It all depends on your personal preferences, as well as the strain that you are growing.

One specific go-to example is to use 120-watt LED lights for the first few weeks of growth, and keep it going for 21 hours each day. In this case, the light should be set up between 70 and 80 centimeters away from the plants. Once you have potted the older plants, you can convert to larger LED lights, and a schedule of 18 hours of light, and 6 hours of darkness.

Pruning autoflower marijuana plants
While pruning (toppings, specifically) can be done in a positive and helpful way with autoflower marijuana plants, certain modifications are needed when pruning regular marijuana plants. For instance, the pruning needs to take place very early in your plants’ lives, to avoid obstructing its vegetative growth later on.

That being said, many growers claim that pruning autoflower marijuana plants at all is a bad idea and should be avoided altogether. They say pruning will lower the autoflowers’ harvest. If you really want to take the risk, try doing it with an autoflower strain that has been proven to take a bit longer than the others. This way, it has more time to recover and grow, after the pruning has taken place.

The harvest: weight expectations
If everything goes well during your autoflower grow season, what can you expect in terms of a harvest? Keep in mind that the perfect environmental elements include being around 73°F, 55% humidity, 400 watts per m2 for light, good air circulation, plenty of oxygen, and a solid nutrient regimen (among other things).

To put it bluntly, your harvest will be proportionate to the length of time that your autos grow. In simplest terms, longer growth equals bigger harvest. Some strains that grow for about 3 months, for example, often average around 40 grams per plant. While longer-growing super autoflower strains might get between 150 and 500 grams per plant, when grown outdoors.

Choosing when to harvest is also difficult, and equally important to all the other decisions you might make when growing autoflower marijuana plants. You generally need to check your plant’s trichomes to see when 50% of them are amber in color. The amber color signifies the point at which harvesting should take place. Make sure you stop watering the plants for at least one or two days before you harvest them so that their extra nutrients go away.

Curing and storing
Curing your autoflower marijuana buds helps them turn into the delicious product that every grower desires. If you cure them poorly, then your efforts will not pay off in great taste. Curing should be done inside an airtight container. This is so the moisture can spread throughout evenly, and move from the middle of the bud, where it is originally held.

During the process, open the container several times per day for a few days straight. Eventually, you should only open it once a day or longer, until the buds are thoroughly cured, several weeks or months later.

Once they have finished curing, the buds should not have much moisture left at all. A tiny amount of moisture is still good for smoking, though. Extra dry buds actually make the smoke more unpleasant.

Store the marijuana inside a sealed container, such as a plastic bag or glass jar. Smoke it within several months, to one year. After a year, it is unlikely that the product will be as pleasant for smoking. Keep it in a dark, cool location. Freezing it can keep it fresh longer.

Growing autoflower marijuana plants outdoors

Growing autoflower cannabis plants outdoors

Although there are certainly plenty of downsides to growing autoflower marijuana plants, they also have some very compelling advantages, as well. Many would argue that their true value lies in being grown as outdoor plants. Or, perhaps even better, many might grow them for some time indoors, and then finish their vegetation and flowering stages outdoors. This usually involves between 1 and 1.5 months of indoor growth, to maximize their vegetative stage. Then, they are moved outdoors (assuming the temperature is not colder than 50°F).

The reason this is considered such a good thing is because you can get several harvests within one plant’s normal growing season. While a huge plant will get you a massive harvest at the end of its growth, it takes 8 to 9 months to ever get that far. Of course, this also leaves more room for unexpected obstacles to mess up your harvest before you even get there.

With the autos, however, you can have numerous crops growing in the same space of time. You are, therefore, achieving smaller harvests incrementally while avoiding a long wait to consume any of the buds. Your work is secured, and you are given you several “chances” within the same amount of time, in case one crop gets somehow ruined.

Autoflower marijuana plants will always be shorter than regular marijuana plants. This means they will not be as easily spotted as the more massive marijuana plants (which definitely tend to attract unwanted attention). Even if you are growing them in your own personal garden on your owned property, they can still easily go undetected throughout the span of their entire growth cycle, because of their small size. For a reference, the most efficiently grown autos have one square meter each to themselves to grow to their full size (and harvest) potential.

Breeding autoflower marijuana plants

Breeding autoflower cannabis plants

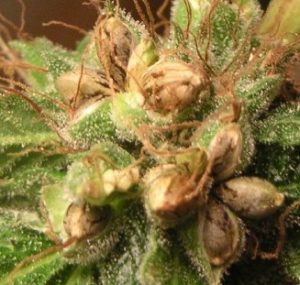
One of the major negative aspects of autoflower marijuana plants is the fact that they cost quite a bit of money to purchase the seeds to begin with. It is likely that these prices will eventually drop as this type of seed become more widespread. Until then, you can breed your own seeds to get the best bang for your buck; however, there is a considerable expense in that as well.

The short lifespan of autos means that – assuming you want to grow and harvest as many plants as possible within one season – you are going to need a lot more seeds than you would with normal marijuana plants. In some locations, this would even mean that buying harvested, dried, and cured marijuana could actually be cheaper than growing your own autoflower weed.

Because many people would like to experiment with this emerging new trend, but want to avoid spending an arm and a leg, breeding is likely the best alternative. It is a surprisingly easy process and is well worth the effort when you consider the smaller harvest per seed in autoflower marijuana plants, compared to normal marijuana plants.

Should you grow autoflower marijuana? Pros and cons

Should you grow autoflower cannabis- Pros and cons

Let’s look at the advantages and disadvantages of growing autoflower  marijuana plants, instead of regular marijuana plants.

Pros
First of all, you have the chance to attain a higher variety of marijuana when you grow autoflower marijuana plants. This is because of the shorter growing season. So within one season, you can grow approximately three separate strains, and get that many different varieties of marijuana for smoking! This is especially valuable for people who are growing just for themselves and prefer a range of highs, which can change depending on their mood or preference that day. Therefore, autos can help keep things fresh and exciting on the marijuana smoking front.

There is also somewhat less hassle involved — at least in certain aspects. For example, you will not need a complicated setup with one grow room and one flowering room. That means that, even if you had the space for that many rooms, you could instead use that space to time your growing so that you can harvest every few weeks. You also won’t have to be so careful with your lighting setup, and grow room light-proof sealing. This is because light leakages have no impact at all on your autoflower marijuana plants’ flowering phase.

Another advantage is multi-crop systems, which are compatible systems that overlap nicely. They allow you to harvest a new crop every few weeks, and can be set up outside. They don’t require much space in your garden and are unlikely to attract much attention if any.

In the case of power outages (which can be more frequent for people in certain locations), normal marijuana plants could have their growth and flowering phases interrupted, and their harvests consequently damaged. You will not have these issues with autoflower marijuana plants.

It is also thought that, because autoflower marijuana plants contain genes from the ruderalis marijuana strain, they may be hardier than other types of marijuana plants. This idea comes from the fact that ruderalis plants are very hardy, and can handle cold and other obstacles better than photoperiod plants.

These plants will also work well in indoor and outdoor areas that have height or size restrictions. Finally, if your growing friends are already growing their own photoperiod marijuana, you can enjoy smoking your own marijuana, while they wait and wait for their own harvest to be ready.

Cons
In terms of light usage per gram of harvested bud, autoflower marijuana plants are less efficient than regular photoperiod plants. This is because you will need the same amount of light per plant although these smaller plants have smaller yields.

Additionally, autoflower marijuana plants tend to be inconsistent in terms of their speed of growth, and their size. Even individual plants within one particular strain might have varying sizes and growth patterns. This makes certain types of growing methods, like hydroponics, particularly difficult — if not impossible. Sometimes it will be necessary to harvest one crop several times until all of the plants have been harvested because they flower and mature at different rates as well.

Some smokers of autoflower marijuana will complain that the aroma of their product is not as strong as that of regular photoperiod marijuana plants. Whether this is a pro or con might depend on your own personal preferences, of course.

Male and female autoflower marijuana plants

Male and female autoflower cannabis plants

A normal photoperiod marijuana seed has a 50/50 shot at being either male or female. This is an unfortunate statistic for the average marijuana grower who is only interested in growing unfertilized female (sensimilla) plants. If you get feminized seeds, on the other hand, you can expect nearly every seed to turn out female.

Autoflower marijuana seeds are not any different in regards to these ratios. Hermaphrodites can be expected in either case and should be watched out for, even if you are expecting all female plants, like when you purchase feminized seeds.

Super autoflower marijuana strains

Super autoflower cannabis strains

If you have done any research into this new autoflowering trend, you have probably already discovered the term “SUPER autoflower” to describe many different seeds. So, what are these super seeds, and how are they different from other autos?

Download my free marijuana grow guide at this link and learn how to grow your own autoflower marijuana

The idea behind the super strains is that they are larger, but still share the same useful trait of flowering automatically. They are stronger and hardier than regular autoflower marijuana plants, especially when it comes to resistance against mold or pests. They were created specifically with the goal in mind of having a bigger, higher yielding autos.

Buying autoflower seeds

Buying autoflower cannabis seeds

Perhaps one of the most challenging aspects of the autoflower marijuana plant growing process is deciding which of the autoflower seeds to buy first. This is an especially important decision if you are a first-time grower or even a seasoned veteran who has never grown autoflower strains of marijuana before.

There are a huge variety of seed strains to choose from, so it is easy to get overwhelmed by all the options. The key is always to consider:

  • What type of growing conditions the seeds will be planted in
  • What ratio of THC to CBD you would like in the strain
  • What taste and smell you prefer in your weed.

If you have clearly defined these main points, then you will have a much easier time choosing the perfect strain for you.

If you have the money for it, it is recommended to purchase feminized seeds, since it will significantly increase your yield (and you won’t need to remove 50% of the crop that turns out to be male plants).

If you just don’t have the money for it, or would like to spend that money on other aspects of growing marijuana, then you can feel free to take the risk and keep an eye out for signs of male plants. Of course, if you are looking to breed more autoflower marijuana seeds, then you will at least one male plant, so don’t bother with the feminized ones, in that case.

For smaller grow rooms, go for the Indica autoflower marijuana strain because they will be smaller, even in comparison to other autos. For outdoor grow setups or indoor setups that are large enough, a Sativa autoflower marijuana strain will be better since they will get to a bigger size and therefore have a greater yield. They will require sufficient space to grow large, of course.

Thanks for reading. Please leave comments or questions below and don’t forget to download my free grow bible.

The post Autoflowering Marijuana Basics appeared first on TheJointBlog.

How To Easily Make Marijuana Clones

$
0
0

By Robert Bergman, ILoveGrowingMarijuana.com

cloneThe knowledge and ability to make marijuana clones is an added bonus for any successful grower – as well as growers of any type of plant. Cloning is a reliable way to have a better harvest and yield without risking certain important factors such as potency. As long as you know which of your plants are the healthiest and most successful, as well as which are males and females, you will be able to clone correctly. If you don’t know these things at this stage in the growing season, you may want to take up a new hobby.

You might even have a specific favorite plant already, which will make the decision process quite easy when it comes to cloning. Cloning is about as close to a guarantee as you can get in the marijuana growing business, so proceed with confidence because it has a very high success rate.

This article will help you successfully clone any plant that you want. We will cover the various methods for cloning and transplanting, as well as more advanced techniques and options that you as the “cloner” can look further into if you are interested. Keep reading and learn to clone like a pro!

What is cloning

What is cloning weed plants

Cloning marijuana plants itself is actually just using the clipping of one of your plants and moving it elsewhere to begin growing by itself. It’s as simple as that!

While the theory is extremely simple, the actual practice isn’t foolproof for some people. For outdoor growers, cloning is the most successful when it’s done in a region with a long growing season. Even with a very long growing season, you can’t expect your clones to reach their full height potential. This is unlikely since they will only start growing about 3 months into the growing season when your original plant is mature. That being said, even short clones can end up with a superb yield, sometimes having a top full of buds.

Most cloners prefer to take the bottom branches from their plants since those branches would receive less light and struggle for survival anyway. If you take between two and four of each of your plant’s bottom branches to make clones, you have at least doubled your harvest. Do you understand now why cloning is such a popular practice?

Although cloning is relatively risk-free since it does not risk the health of the original plant and your main harvest, clones often die before they are even able to root. It is not uncommon for just one out of ten clones to survive, so don’t be discouraged when most of them die.

Select a mother plant

Select a mother plant make cannabis clones

Don’t be hasty when you are trying to decide which of your plants to clone from. You need a plant that is hardy, growing rapidly, with great yields, large roots, and strong buds. When taking cuttings to clone your plants, you should make sure that your plant is in a vegetative state. If you take them during the flowering stage, then it will become much more difficult for your plant to take root, thus making your clones’ mortality rate will be higher.

If this is your first time cloning, then you may not actually know your plants well enough or have enough experience to know which ones are the best to choose. Regardless, if you choose a female that is in its vegetative state that appears relatively healthy, then you are probably choosing one that will work fine for cloning.

Download my free marijuana grow guide at this link for more cloning tips

At the absolute minimum, your chosen plant needs to be two months old. In fact, it should have been in the vegetative state for two or three months already. If you wait this long to remove branches for cloning, then you should be able to get many clones from the one plant.

Once you decide on a plant, be sure to prepare it properly. It should receive ten percent less nitrogen than normal starting a week or two before you clip its branches. This will help its clones have a higher chance of successful rooting after you have clipped them off.

Cloning Techniques

Cloning techniques weed

When you cut the branches from your plants, make sure you end up with 6 to 8 inches of each branch. Also be sure to leave at least one pair of leaves on the branch so that two new branches can sprout. Remember to cut out branches from the bottom, since they aren’t as productive as branches higher up on the plant anyway. This will promote faster rooting in the clone. That being said, you also might want to consider cutting from the top if you want the resulting plant to flower more quickly.

You will need a knife that is quite sharp (to avoid any ripping during the cutting process). Make sure you always cut diagonally, since this will maximize the surface area from which roots will hopefully sprout. Buy cloning gear like knifes, rooting gel and rock wool cubes at this link

Rock wool method. All you have to do is trim healthy cuttings from healthy plants. Make sure to clip off most of the leaves, but leave the top ones intact. Dip each cutting in rooting gel or powder and then place it in a rock wool cube under a CFL light. The ideal temperature is around 72-75*F (22-24*C). The roots should start showing up in 8-12 days. Make sure to soak the rock wool cubes in pH 5.5 water for a few hours.

The Potting Soil Method. Because you will want the cutting to use all of its resources and energy for sprouting roots, take away any mature leaves that are on the stalk. Then wet the sliced bottom of the stalk and dip it into rooting gel or powder. Right after that, stick the plant into the saturated potting soil under cfl lights, where it should remain while roots are forming.

The Water Method. You should also remove the mature leaves from the cutting with this method. After that,  get a container of some sort (a plastic bottle of about 16 ounces is best, since it has a narrow neck that will be helpful in holding the plant up) and fill it with water that has been treated with plant food. Submerge the stalks of your plants into this water and leave them there, mixing things up every couple days to make sure algae doesn’t grow too much. If you do discover an algae problem, you can change the water.

Keep sunlight indirect or less intense than normal until new leaves are growing at the top. This new leaf growth usually happens at the same time as root growth. You should soon have a nice ball of roots as a sign that it’s time for a transplant.

Transplanting clones

Transplanting cannabis clones

Since you probably have already transplanted your seedlings during this growing season, you will already have the knowledge for transplanting your clones that have rooted in soil.

Clones that were rooted through the water method, on the other hand, will require a new technique. First, dig a hole that is one foot deep and one foot wide. You will then need to move the actual container that is holding the rooted plant and its water all the way to the site where you will transplant it. It is crucial that you do not expose the roots to the air, so despite the inconvenience this is an important part of the transplanting process.

Put the plant in the hole and fill the rest of the hole with potting soil mixed with dirt that was dug up. Pat down the soil firmly but gently, then water the entire area with a half gallon or more of water mixed with plant food.

In general, clones that have already taken root have a very high chance of survival. This is simply because the original plant they were a part of were already mature and strong, meaning that a clone with roots is no different. It should begin the flowering stage within two or three months. Take note, however: sometimes the clone ends up being a different sex than your original plant, so don’t be shocked if it happens. Read the article When and how to transplant marijuana plants for more info

Caring for your clones

Caring for cannabis clones

You should keep your clones’ grow room temperature a bit warmer than standard room temperature, so between 72 and 77 degrees Fahrenheit. Since cuttings don’t have roots yet, watering the soil around them will not do any good. Instead, spray them with water several times a day so they can absorb the water through their leaves. You may also want to consider spraying a mild nutrient solution as well. Make sure it’s also hitting the leaves since they will also absorb the nutrients through their leaves as well.

If you invest in a mechanized cloner, you won’t have to worry about monitoring the moisture or temperature. The cloner will do it for you, thus (more or less) automating the entire thing.

Some growers make the decision to not use any lights at all for a day or two while the clones are adjusting to their new surroundings. Others start with a bright light and then use a dimmer grow light after a couple days. For roots to form, you should also ensure that there is at least some darkness each day. Try 18 hours of light and 6 hours of darkness.

When you are using powder or gel that is designed for rooting, ensure that it has been stored properly. It, like many products, needs to be stored in a cool, dry place. If there’s any chance that it has been contaminated, definitely do not use it under any circumstances. Whether the packaging wasn’t sealed properly or anything fell into it, even natural materials like leaves or dirt, it could have a negative effect on your plants.

In general, the most effective way of giving your clones a chance at growth is to keep a constant, close eye on them.

Thanks for reading. Please leave comments or questions below and don’t forget to download my free grow bible

The post How To Easily Make Marijuana Clones appeared first on TheJointBlog.

How to Recognize Quality Marijuana Seeds

$
0
0

By Robert Bergman, ILoveGrowingMarijuana.com

High-quality cannabis starts with good genetics. If you know what you’re hoping to get out of your buds, then you’ll want to do some research on available strains to make sure youmarijuana seeds maximize your chances. As a bottom line, you want to make sure that you are using healthy viable marijuana seeds, otherwise you won’t get any crop at all! The best place to start is with a reputable seed company.

The first step for most new growers is to extract seeds from large commercially purchased bags of cannabis. This is likely the easiest way to get seeds, but be warned— the cannabis has already been heavily processed and packaged. Huge quantities of bud are dried and cured together en masse, and then snipped and stuffed into big vacuum-sealed bags.

Throughout all of this, they might go through a lot of rough handling and questionable environments. Since the legality surrounding cannabis cultivation is hazy in most parts of the world, there aren’t very many regulations that need to be followed. Instead of leaving it to hope that you might find quality seeds in your stash, read this guide first. If you want to make your own feminized seeds, read my article How to make feminized seeds.

What are quality marijuana seeds

Where to get quality weed seeds

What this means for the consumer is that it can be difficult to get good seeds. Seeds are, in fact, considered undesirable by most commercial growers, and many of the seeds that sneak into the end product never reached full maturity before being harvested. There’s just no good reason for commercial cultivators to ensure that each and every bud has reached maximum maturity and that the seeds are robust and healthy.

The only reason you’ll be able to find marijuana seeds at all is the difficulty growers have in finding and removing all of the seeds. Commercial growers have nothing to gain by offering free seeds to consumers. Another factor that can come up is freezing seeds, especially in northern latitudes. You won’t know if the seeds have been frozen when you get your cannabis, but if the seeds have in fact been frozen, they are far less likely to produce viable plants.

Download my free marijuana grow guide at this link for more growing tips

With moderately healthy stock, you’re likely to see about one in every three cannabis seeds actually sprout. Although relatively robust, there are many factors which can prevent sprouting: seeds with damaged husks, immature seeds, or seeds that have been damaged by environmental extremes. Additionally, seeds won’t last forever. If the seeds are too old, they are also very unlikely to sprout.

There are a couple steps to take when culling seeds to make sure you are saving the best candidates for sprouting. While you’ll never reach a perfect success rate, you can learn to discern good seeds from bad ones. Mature cannabis seeds are a dark brown, often marbled through with lighter shades or stripes. In general, you’re better off avoiding seeds that are pale green or white since these probably aren’t mature. Big fat seeds are ideal, and they should have a fairly rounded shape. You can use smaller seeds too, but as a rule of thumb, you’re more likely to develop a healthy sprout from a bigger healthier seed.

How to find the best seeds

Where do cannabis seeds grow

Cannabis seeds grow underneath the buds themselves, sandwiched in between the plant matter and the parent stem. They’re difficult to see because of these and have a cushion of protection to guards against all of the drying, curing, processing, and packaging that they’ll go through before they get to you. This is why seeds manage to survive at all.

Young marijuana seeds are also protected by a white-green cellulose sheath that will wither and fall away as the seed matures. To remove them from the plant itself, the best method is to simply find them and gently nudge them free of the stems with a little finger or thumbnail. Feel free to discard any seeds with damaged or scratched surfaces. The same is true for any immature seeds with white seed coats.

Veteran growers might want to grow a mix of both male and female plants, but this is not recommended for most growers, especially inexperienced ones. There is a high risk of inadvertent fertilization, which can ruin the yield of an entire crop. Unfertilized female plants produce the biggest and best yields.

Fertilized females can still provide a crop, but the end yield will inevitably be much smaller and the buds filled with seeds. Mainly they can provide the seeds necessary for the next generation. Multigenerational breeding is extremely complex, however, and extends beyond the scope of what we’ll talk about here. For now, consider purchasing feminized seeds from a commercial distributor. This will simplify the process, and make it much easier to get started if you’re new to cannabis cultivation.

Keep in mind that if you do end up purchasing feminized seeds, you will get only female plants. With no males in the area to pollinate the female plants, you won’t get very many seeds if you get any at all. Over the long-term, this can be something of a drawback for a home grower since it’s impossible to harvest seeds for the next crop. It also means you won’t be able to reproduce the same crop, which can be frustrating if you find a strain that you really like. Read more in the article What are regular, feminized and autoflowering marijuana seeds

Buying top shelf seed

Buying top shelf cannabis seeds

It takes a lot of trust to buy cannabis seeds. There’s no way to know what strain you’re getting by looking at the seeds themselves. You won’t know anything about the genetics, except the information you’re given by whomever you’re purchasing from. This is one of the biggest reasons why you’d want to purchase your seeds from a reputable company or seed bank. Random dealers won’t necessarily know any better than you what strain they have.

When you buy seeds, try to choose a seed bank or company that offers some client support. Cultivating cannabis isn’t too difficult, but because of the nature of the plant, you can’t just ask friends and family for help and support. Usually seed banks and commercial companies will be available for some troubleshooting since it’s in their best interest to help customers and maintain a positive reputation.

It takes a lot of experience and expertise to produce high-quality seeds. The entire process of selecting, testing and producing a batch of seeds can take up to a year or more. Still, it’s worth it to know you have the right strain, and in a feminized form.

The post How to Recognize Quality Marijuana Seeds appeared first on TheJointBlog.

Viewing all 94 articles
Browse latest View live